clear all

Type

Gita's magazine
Video tutorials
Step by step DIY
Styling ideas
Learn new Technics
Most popular
Crystals inspiration
Color combinations
Technical questions

Jewelry

Necklace
Bracelet
Earring
Ring
Pendant
Hair Accessorie
Jewelry sets

Techniques

Embedding
Gluing
Beading
Other
Crimp Elements
Stringing

Materials

Cup chain
Stone setting
Metal embedding
Metal casting
Charms
Chains
Swarovski
Cabochons
Beads
Leather
Strings
Pearls
SW rhinestone

Skill level

Beginners
Intermediate
Advanced

Metal Plating

Antique Silver
Antique Silver
Antique Copper
Antique Copper
Antique Brass
Antique Brass
Shiny Silver
Shiny Silver
Gold
Gold
Nickel
Nickel
Rose Gold
Rose Gold
Black
Black
Bronze
Bronze
Noir Black
Misty Gold

Colors

Black
Black
Gray
Gray
White
White
Yellow
Yellow
Orange
Orange
Red
Red
Pink
Pink
Purple
Purple
Blue
Blue
Turquoise
Turquoise
Green
Green
Multi-color
Multi-color
Brown
Brown
Metallic
Metallic
Beige
Beige
Sparkly
Sparkly

Themes

Casual
Basic
Fancy
Bridal
Ethnic
Urban
Young
Vintage
Flowers
Winter
Spring
Summer
Autumn
Christmas
Valentin’s day
Mother’s day
Holidays
Religion
Evening

How to use end cups with cup chains by meter tutorial

How to use end cups with cup chains by meter tutorial

29/10/2015
How to use end cups with cup chains by meter tutorial

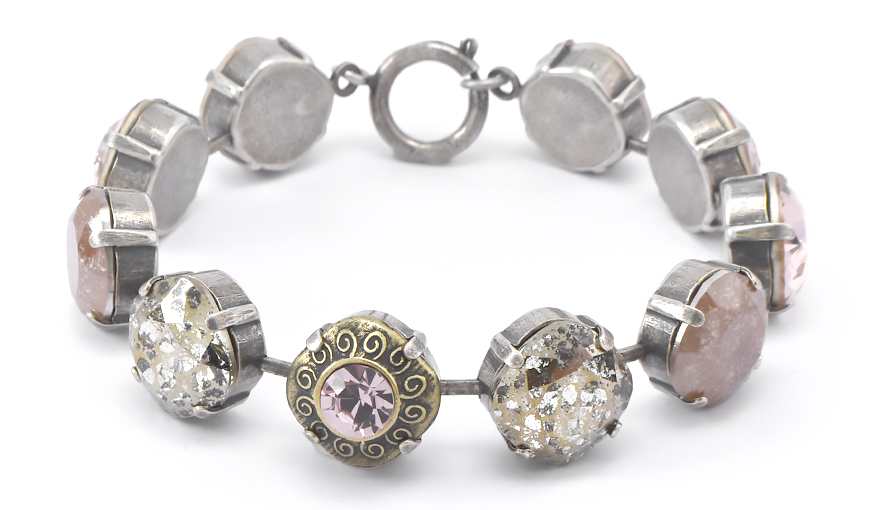
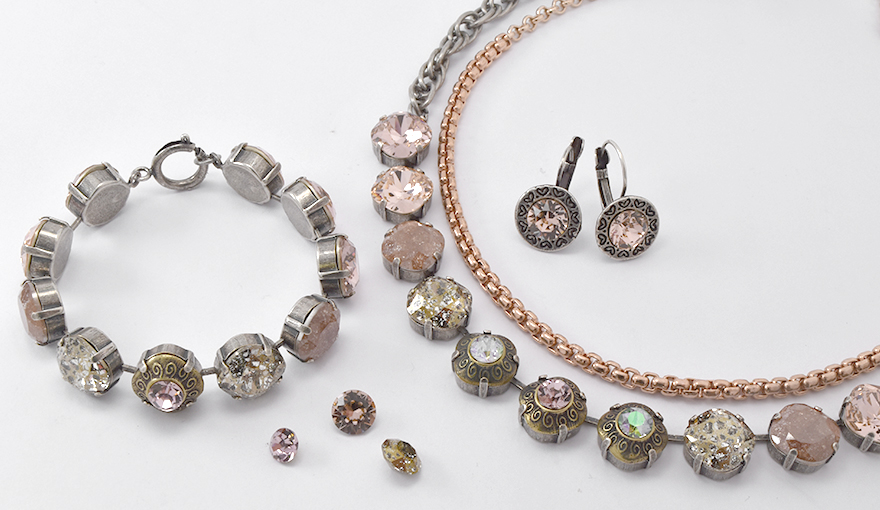
This color combination is using the rustic shades of pink, brown and gold, to make a feminine and soft look in this jewelry set.


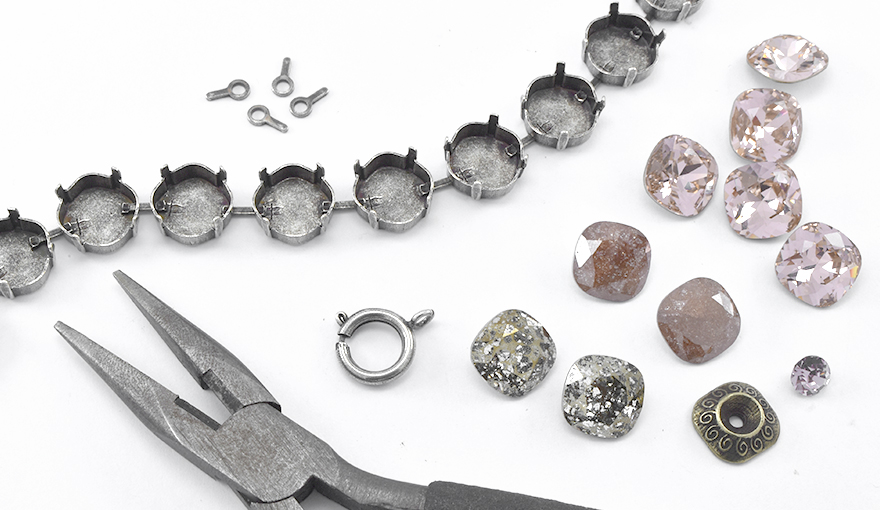
Step 1: Preparing your materials

Prepare your work environment. Organizing your tools and materials will help

you work faster and more efficient.


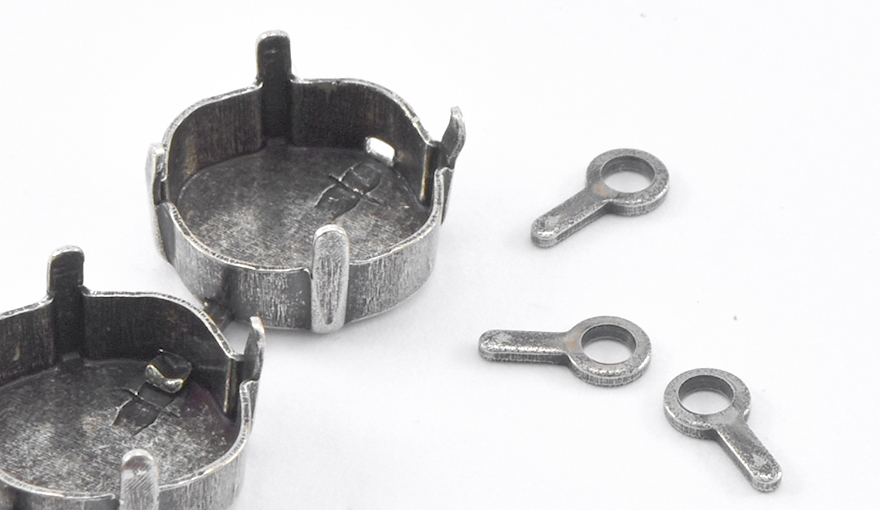
Step 2 : Using cup chain by meter

Use a cutting tool to cut the cup chain by meter to a small part.


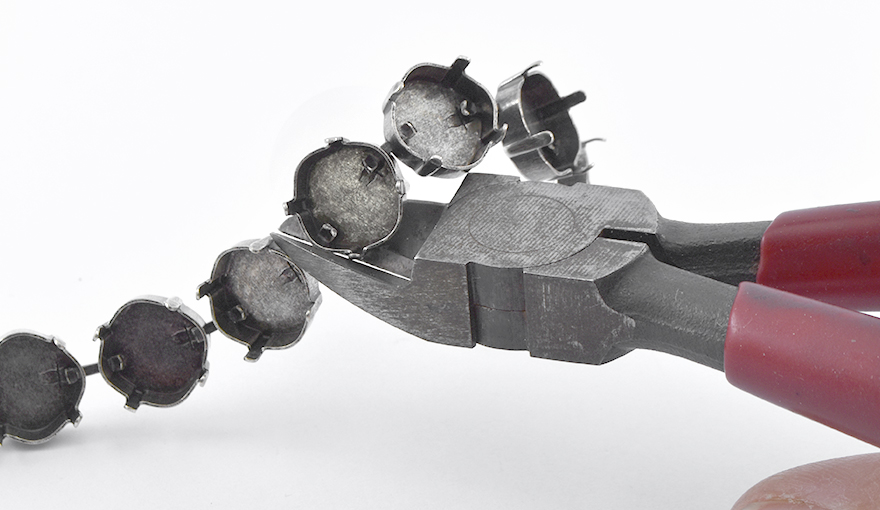
The end cup is inserted to the hole on the last stone setting.


Press the end cup with a plier tool to its place.


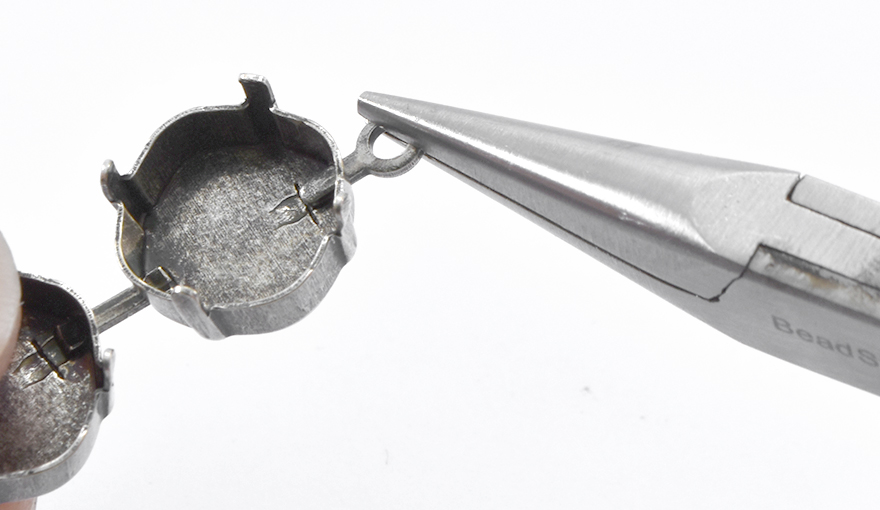
Lift the edge of the end cup with the plier tool until it folds in half.


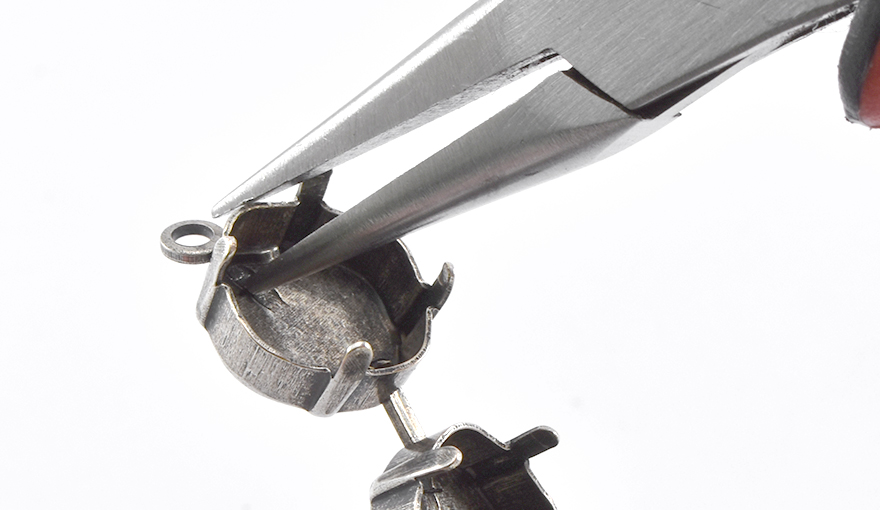
Now that the end cup is connected you can connect a clasp or a jump ring to finish the bracelet.


Step 3 : Finishing the bracelet

Connect the clasp at one end of the cup chain and a 6mm jump ring on the other.

Place the stones in the center of the stone setting and with the help of the setting tool bend the prongs towards the stone in order to embed it.


Well done!

The bracelet is ready!

Enjoy your new beautiful Swarovski bracelet.

Gita team.


Title
Plating/Rhinestone
Quantity
Price
Sale Expires:

1
$7.6

$3.0
6mm Rope chain Price for 1 pack 5001420
Sale Expires:

1
$13.3

Related Tutorials:

Brass necklaces in a total golden brown look
Earth tones of brown and gold are the inspiration for these Brass plated bases and Swarovski crystal...
Styling ideas
What is your Birthstone?
Swarovski offers an incredible range of crystals that correlate with Birthstones, in the most beauti...
Gita's magazine
Introduction to the crown settings collection
Every jewelry designer has her classic and simple style jewelry collection that is quite basic but w...
Gita's magazine

Help us improve our school

Was the information Usefull? Yes No
Name:
Email Address:
Which other tutorials or articles would you like to see
Please note any suggestions for improvements for us to get better?

Please Wait

Succuess

Error Failed

0.6834977