clear all

Type

Gita's magazine
Video tutorials
Step by step DIY
Styling ideas
Learn new Technics
Most popular
Crystals inspiration
Color combinations
Technical questions

Jewelry

Necklace
Bracelet
Earring
Ring
Pendant
Hair Accessorie
Jewelry sets

Techniques

Embedding
Gluing
Beading
Other
Crimp Elements
Stringing

Materials

Cup chain
Stone setting
Metal embedding
Metal casting
Charms
Chains
Swarovski
Cabochons
Beads
Leather
Strings
Pearls
SW rhinestone

Skill level

Beginners
Intermediate
Advanced

Metal Plating

Antique Silver
Antique Silver
Antique Copper
Antique Copper
Antique Brass
Antique Brass
Shiny Silver
Shiny Silver
Gold
Gold
Nickel
Nickel
Rose Gold
Rose Gold
Black
Black
Bronze
Bronze
Noir Black
Misty Gold

Colors

Black
Black
Gray
Gray
White
White
Yellow
Yellow
Orange
Orange
Red
Red
Pink
Pink
Purple
Purple
Blue
Blue
Turquoise
Turquoise
Green
Green
Multi-color
Multi-color
Brown
Brown
Metallic
Metallic
Beige
Beige
Sparkly
Sparkly

Themes

Casual
Basic
Fancy
Bridal
Ethnic
Urban
Young
Vintage
Flowers
Winter
Spring
Summer
Autumn
Christmas
Valentin’s day
Mother’s day
Holidays
Religion
Evening

Basic lava beads string making with loops

Basic lava beads string making with loops

21/10/2015
Basic lava beads string making with loops

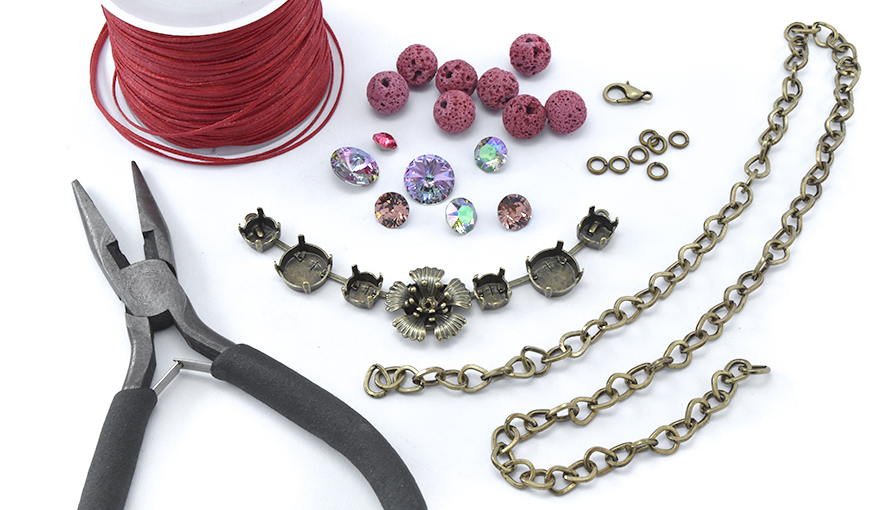
step 1: Preparing your materials


Prepare your work environment. Organizing your tools and materials will help

you work faster and more efficient.


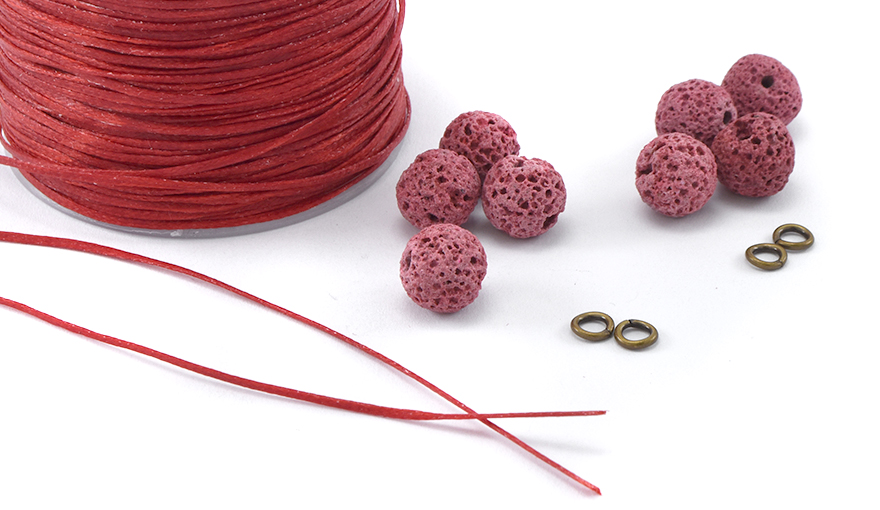
Step 2 : Creating the Lava beads connector

Use two small pieces of waxed polyester cord, 8 Lava beads and a few jump rings.


Tie the cord on the jump rings - make two knots.


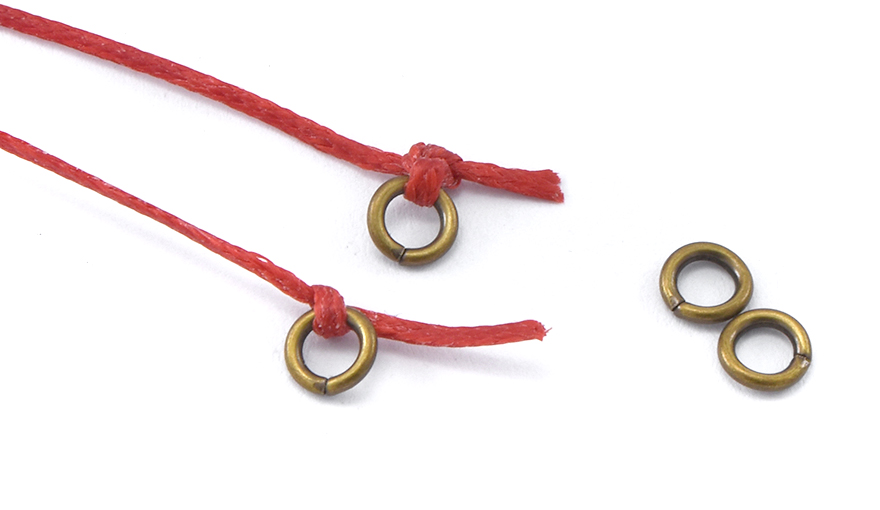
To close the knot, just heat the cord and the wax will melt so that the cord cannot be opened


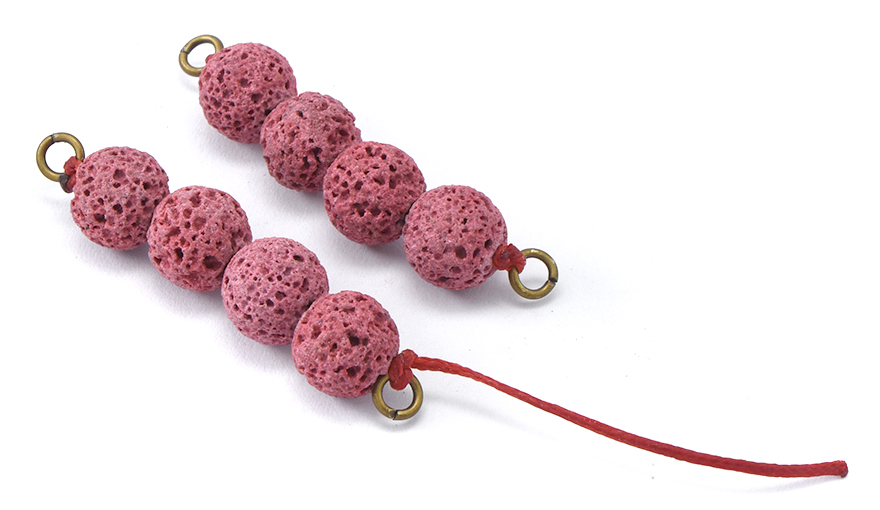
Slide the Lava beads on the cords.

Make a strong knot on the other side of the beads, and close it in the same way.


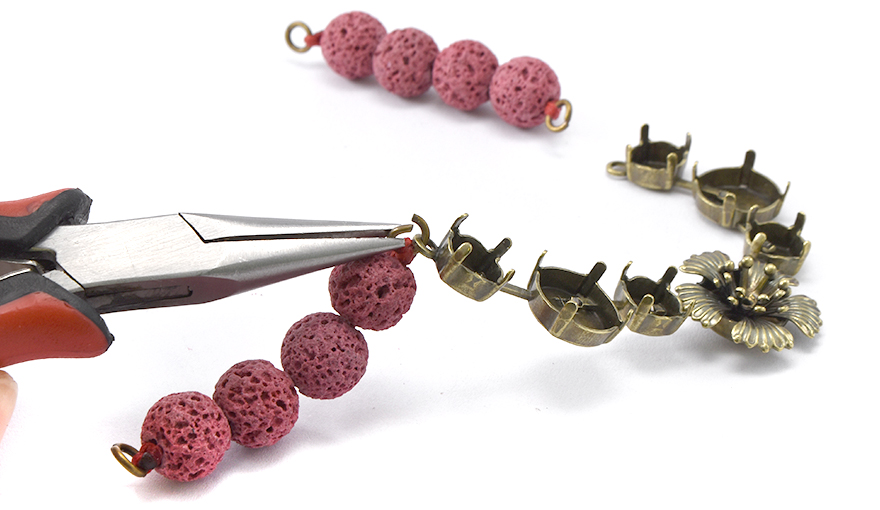
Step 3 : Closing the necklace

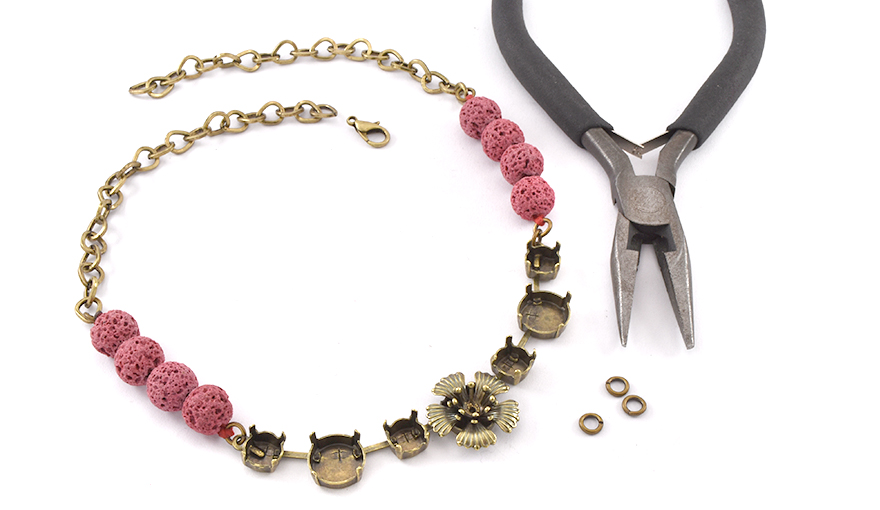
Open the small jump rings with the plier tool and connect them on each side of the center piece.


Connect the chain and clasp at the ends of the chain to close it.


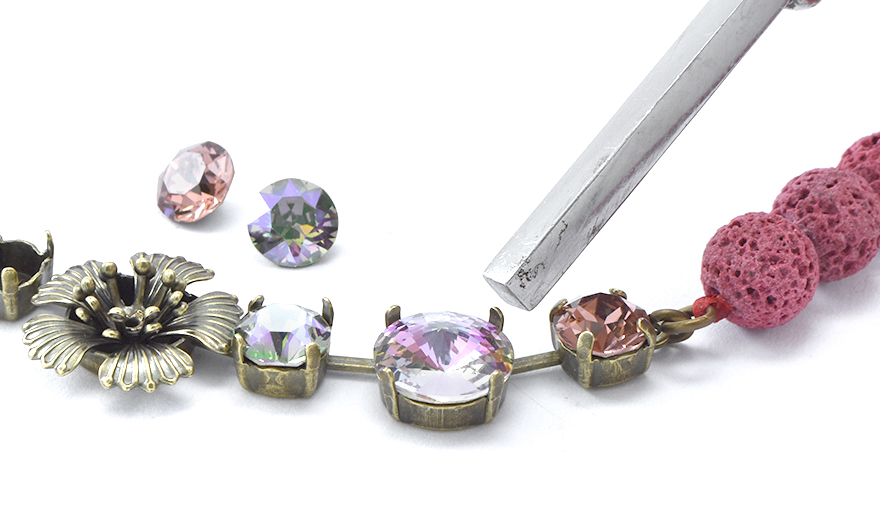
Step 4: Setting the stones

Place the stone in the center of the stone setting and with the help of the setting tool bend the prongs towards the stone in order to embed it.


Use a small amount of E6000 glue to embed the small stone in the middle of the flower.
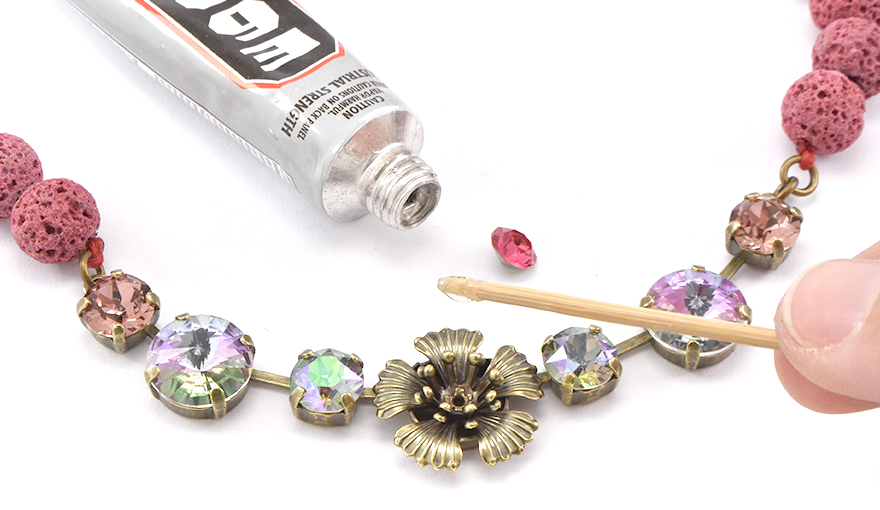


Good work!

The necklace is ready!

Enjoy your new beautiful Swarovski necklace.

Gita team.


Title
Plating/Rhinestone
Quantity
Price

Help us improve our school

Was the information Usefull? Yes No
Name:
Email Address:
Which other tutorials or articles would you like to see
Please note any suggestions for improvements for us to get better?

Please Wait

Succuess

Error Failed

0.68832