This is a guide for beginners that we have gathered together, with a few simple tips from our experience that will help you create stunning pictures of your jewelry, with minimal effort.
One of the most challenging parts of running an online store is capturing the beauty of your products in a way that allows your customers to admire your creations, and to purchase them, without touching or trying them on.
By placing your products on a white or solid color background, you will be able to present your jewelry line in the best way possible, and use the pictures for online or print advertising. Jewelry is not an easy item to capture with the
camera lens. Have you tried taking a picture of a mirror without catching your reflection too? The challenge is to maintain the beauty of the metal and stones, without catching any unwanted reflections.
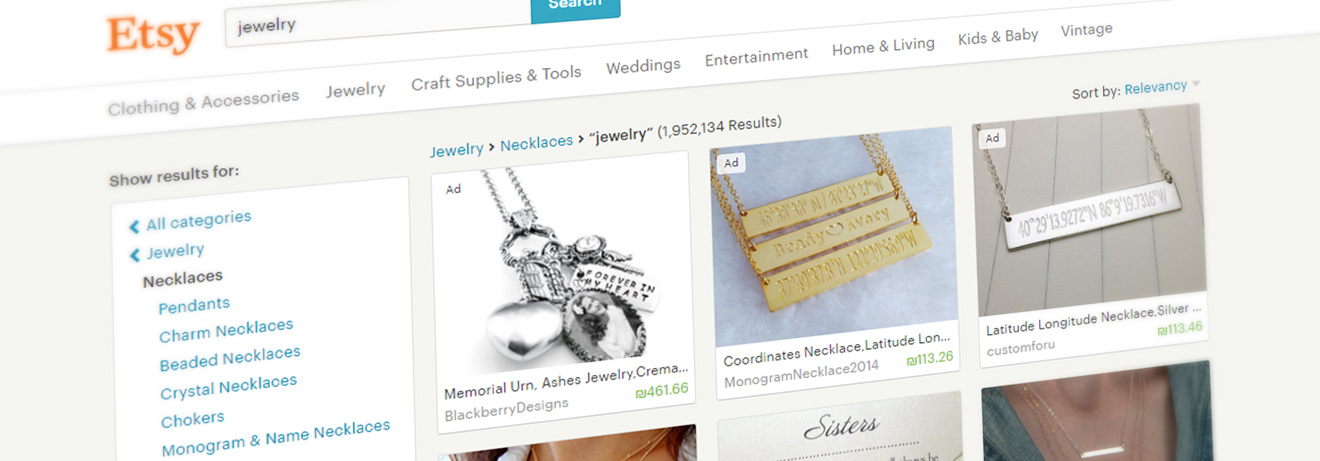
All of the UI experts say that professional product pictures contribute to the success of your online business. Wherever you are presenting your jewelry line, whether it is an online shop, catalog website or an Etsy shop, fantastic
pictures are no longer a privilege, but a must.
You want to take a good picture that presents all of the unique elements in your jewelry, but also an attractive picture that will lure your customers into purchasing them.
So what is a good jewelry picture?
1. One in which you clearly and immediately see and understand the product on sale
2. Illustrates how the product will look and feel when she receives it - color, size, and texture.
3. Demonstrates how to use the product or how it will look on a body.
Tip no. 1 - The main event
When you want to present a product in your online catalog, it is best to upload 3 or 4 photos for each item to your website to give your customer all of the necessary information, with the first and main picture being the best and the most tempting one, of course. You want your customers to see the picture and feel that they have to own the item, which is why the first image is so important. Once you have their attention, you can move them on to more detailed pictures of the product.
The main product picture is like your shop window - it is the one who goes out to greet your customers when they walk into your store, which is why you want to make sure it is the most beautiful and professional looking picture!
Think about your potential customer in the online world. They go through many pictures, which means your picture is fighting for their attention, all of the time!
Tip no. 2 - Additional images with extra information
Once they have shown interest in the product, they will click to find out more information, and this is where you want to show more detailed pictures of the product. Make sure to upload 3 - 4 detailed images for each product, in addition to the main one.
When taking additional informative pictures, you need to take some important elements into consideration:
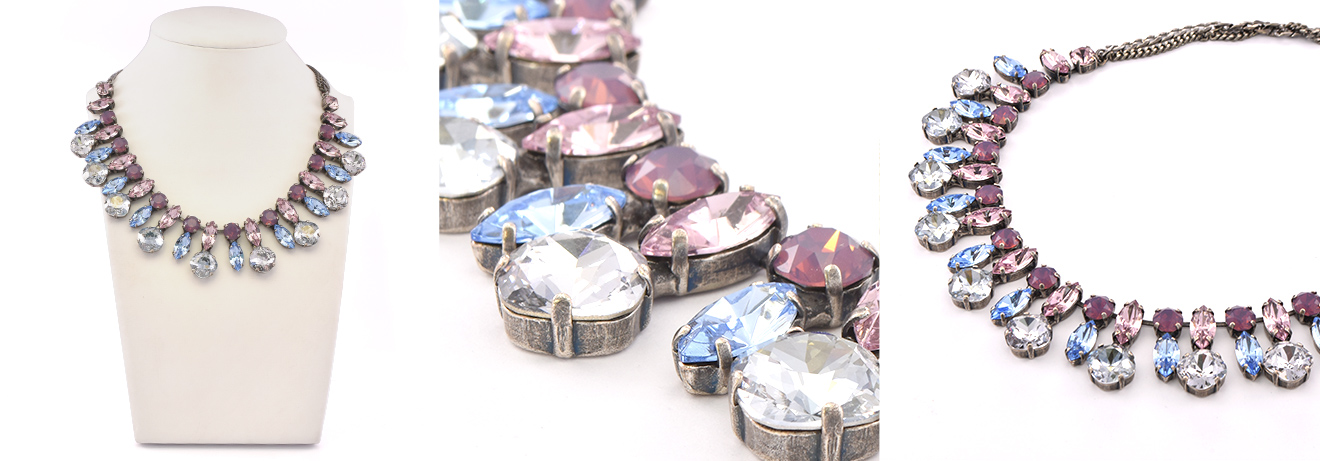
1. Try taking pictures from different angles, to give your customers a good idea of how the item looks; don't settle for only one picture.
2. Take a close-up picture of each item, especially of the features you would like to stand out, or features that are crucial to understanding the concept of the product.
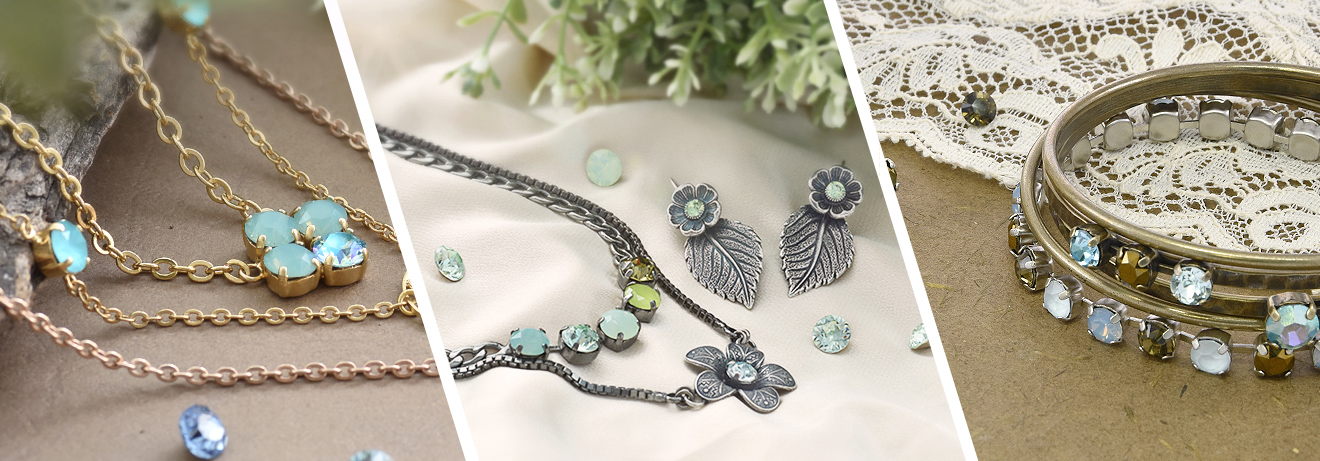
3. Jewelry, more than other commodities, has to match the body's proportions. Therefore, we recommend you take a few pictures of each item on a model or next to a smaller or bigger element so that your customers get a grasp of its actual size. Try to show the jewelry on a model if possible and if not you can use a dress doll.
Tip no.3 - Organizing the pictures on your website and branding aesthetics
Remember, when you upload the images to a catalog, it is crucial not to address one single picture, but a group of pictures and how they look together as a group. Make sure there are no differences between them in color or style; this will give your catalog a more professional look.
The angle and unity of the pictures have an imperative meaning for your branding. Maintain a unified branding look in all of your photos. As time goes by, your customers will learn to recognize your brand just by your pictures, and this is precious for your business.
To create a unified brand look, make sure to write down the exact technical measurements: distance and angle between the jewelry and the lance, the amount of light and the camera settings for the next time you photograph your jewelry collection. This way you will maintain the same look, within all of your pictures. For this reason, it is essential to use a tripod or similar camera support.
Tip no. 4 - Lighting
Lighting is probably the most important element in photography. It does not matter which camera you are working with, if you have bad light, you will get bad pictures. We recommend you invest in proper lighting equipment.
When you choose your lighting, you need to take a number of elements into consideration:
1. Warm or cold: for taking pictures with a white background it is the best to use white light, without any coloring. If you want to give your pictures a more natural look, you can use a yellow light.
2. Make sure all of the bulbs are the same; otherwise you may get different pictures in different shades.
3. Strength: When the lighting is strong, you can close the lens speed and enjoy a clearer picture. When the set is not lit enough, you will need to compensate by speeding up the shutter speed to get more light into the picture. This will make the image lose focus.
4. To get the best results, use a softer lighting. If you are using a regular bulb, make it softer by suspending a layer of a light-diffusing material in front of the bulbs. Diffusion sheets, baking paper or a simple white A4 paper should work.
5. Another tip is to use a tripod. When the camera is fixed, and there is no movement in the frame, you can decrease shutter speed. This way, you will let more light enter the frame, and the picture will be more focused and sharp.
.jpg)
Tip on. 5 - White Background
The background is another important element when taking pictures of jewelry. Try to maintain a clean setting, not too cluttered. Clean and straightforward, to make sure jewelry piece is the main star of each picture. You can use either a plain background or any other texture, to give your photos a more attractive and unique style.
When taking pictures on a white background, there are some important steps to follow:
1. You don't have to invest in expensive equipment to get good pictures. Use simple elements to prepare your set and improve the quality of your pictures. A white Bristol paper with three lamps should do the trick.
2. Lighting: Use lamps that will give the picture good lighting. Mainly use one lamp to light up the white background and separate lamps to light up the item from both sides.
3. Retouching - this is a simple equation; the more you work on each picture, the less work you will need to do in the retouching part.
4. You can also use a light box.
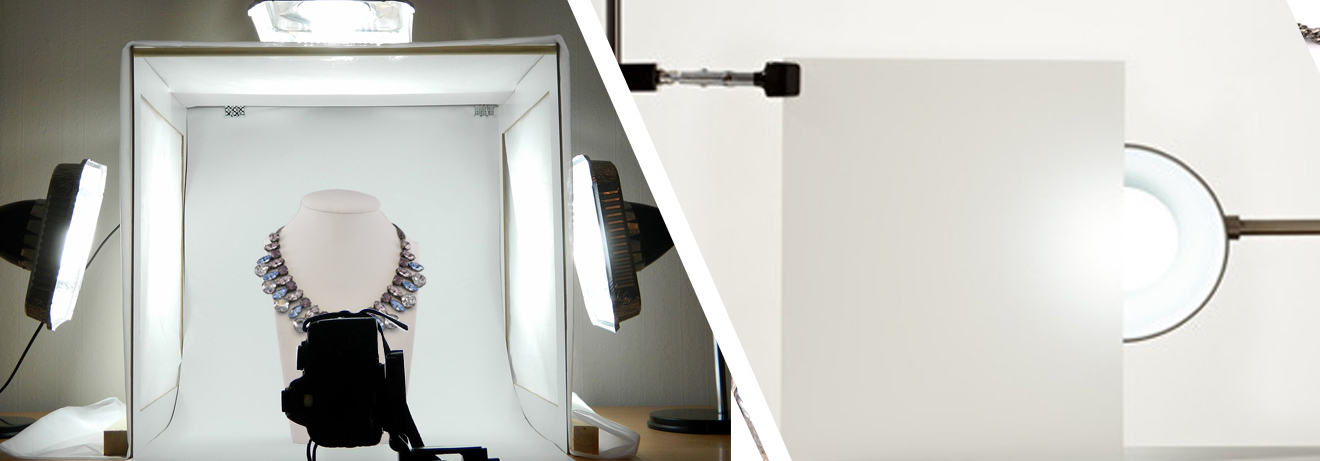
Tip no. 6 - Lightbox
Photographing jewelry can be challenging and is different than other types of photography. Jewelry, in general, is a shiny element and the challenge surfaces when you photograph your jewelry inside a regular lit room. It may cause unwanted reflection of the room and its surroundings on the surface of the jewelry. One of the main things we want to achieve when photographing jewelry is to eliminate all of these unnecessary reflections. You can obtain this by taking pictures of the items inside a lightbox. The lightbox is white and prevents all of the reflections.
Unified lighting - Many designers ask why I take picture after picture, with seconds between them, yet the light still looks different in every picture and why all of the pictures I took last month look completely different that the ones I just took - what can be done to prevent this from happening?
The answer is similar - neutralize the surroundings from the set. You can do this by making a light box, or buy a readymade one. The primary goal is to create a single lighting setting that will produce the same lighting in all of your pictures, regardless of its actual surroundings, no matter the hour of the day. Make sure your lightbox is big enough, of course, to fit your jewelry.
Tip no. 7 - The Camera
In controversy to common thought, you do not need an expensive camera to create amazing pictures. It is enough to use a simple DSLR camera or a digital camera, but whatever you do, do not use your smartphone camera!
Lens - you will be able to find a broad range of lenses; from zoom lenses to macro lenses for bigger depth of field. But do not get confused by all of your options, using a regular lens will give you amazing results without spending all of that money on special lenses.
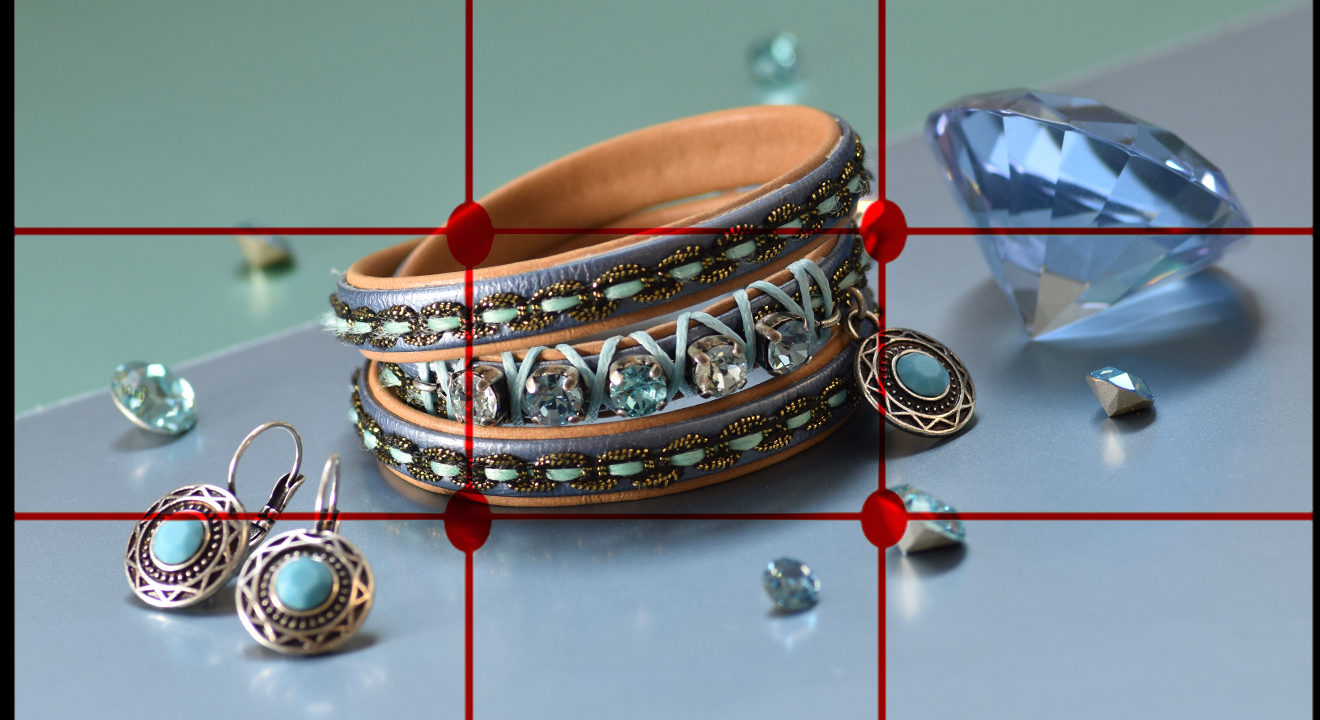
Tip no. 8 - Composition
Although photography is not an exact science, you will still need to take the composition into consideration. Pay attention to where you locate the item inside the frame, if it is centered or facing a 45 angle.
The most important part is to plan your frame carefully and make sure what is the exact spot and angle of each product inside the composition.
Sometimes, when you modify the angle of the camera the light will change in the lens, so try to use that change and look for that most attractive photograph you can create.
You can always use the three-thirds rule and divide the picture frame into three parts, then position your jewel according to this method in the center, the side, and the centered part etc.
Tip no. 9 - Retouching
You can find many retouching software's that all work on the same basic concept. There are also many free programs online you can use. Even the most experienced studios with the most expensive equipment have to make minor repairs on the pictures like clarification, sharpening images or deleting unnecessary dirt.
As we said this field of jewelry photography is not an exact science and if you follow even some of the tips in this article you will see that it is not that complicated or hard to do, and the results can truly be amazing!