This is GITA’s guide for gluing crystals that will help you find the way to work faster, simpler and cleaner and reach the most beautiful results!
1. Choosing the right crystal size
Choosing the right size of the crystals that will be perfect for the holes of the element you want to glue them on is very important, especially if you are planning to make a lot of the same element.
The crystals need to set straight in their place. Make sure they are not too small and will get lost in the glue, or will be too big so that most of the crystal would be outside of the hole, and will most likely to fall off.
If you are not sure, choose the smaller option, because they will have less chance to fall.
This is a great trick to make all the crystals face down, so you can pick each one from the same position and work faster.

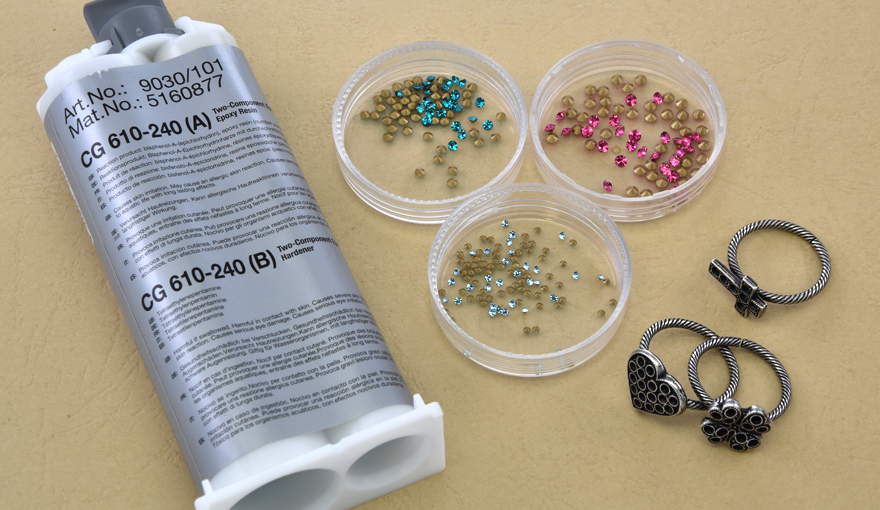
2. Choosing the right glue to use
When you have the element with the right size crystals for it, you can choose the right glue to use.
CG 500 GLUE - designed for gluing small crystals starting with 0PP and up to the size of PP 14.
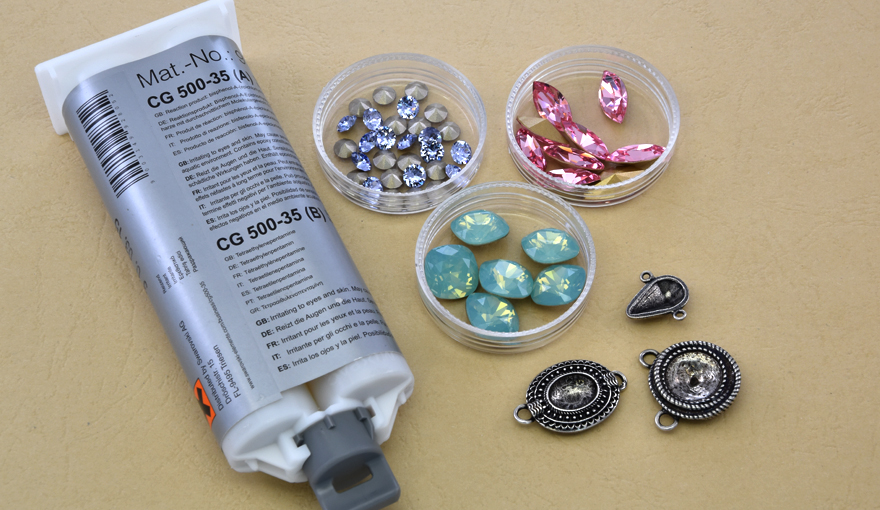
CG 610 GLUE - designed for gluing larger crystals starting with 14PP and up to a much larger sizes.
It is important to follow the instructions for using these glues to get the best result possible.
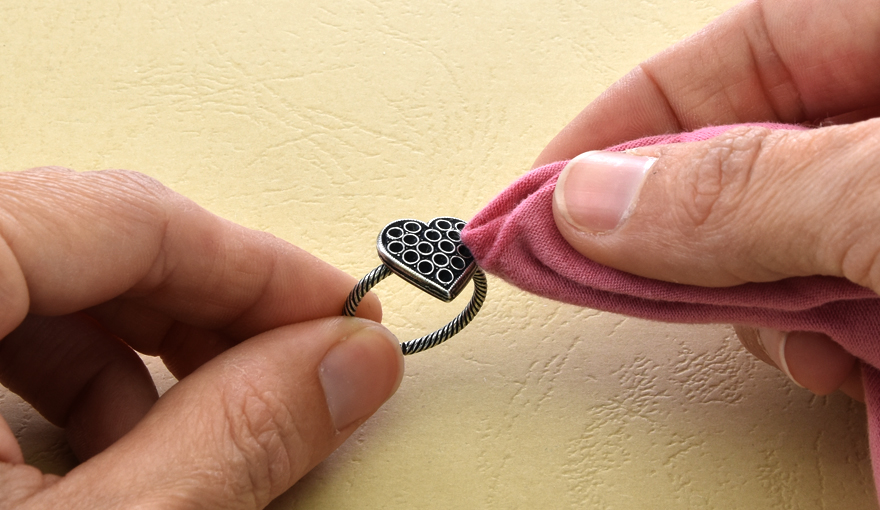
3. Cleaning the surface
The surface of the element for gluing has to be clean for the glue to connect strongly between the element and the crystal.
Use an alcohol based product such as acetone to clean and remove any oils that may be on the surface of the element.
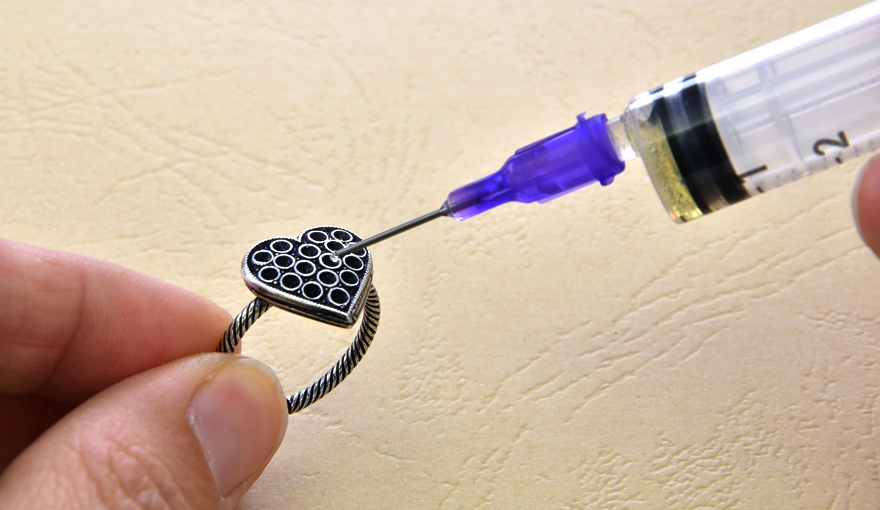
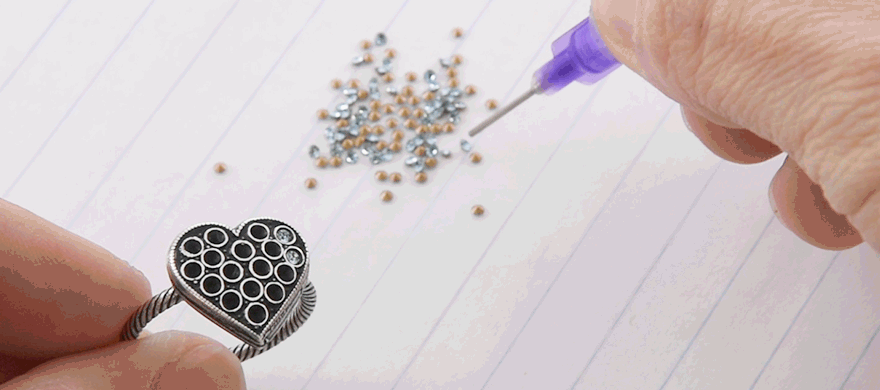
4. Appling the exact amount of glue
When dealing with such small crystals, one of the main challenges is to apply the right amount of glue so it will be enough to hold the crystal but not too much so that the glue will not cover the crystal completely.
The best and cleanest way to apply the right amount of glue is to use dosing syringes with a dispensing tip.
Put the glue in the dosing syringe with a dispensing tip.
Press to pull out a tiny amount of glue to fill 1\3 of each hole in the element.
5. Two ways to hold the crystals
Wax - take a small piece of soft wax and roll it, now stick it on the edge of a toothpick.
This is the simplest tool to use, for picking up the small crystals and putting them in their place.

Vacuum pump - this is a small electrical device that has a silicon tube with a very small metal tube that vacuums the air.
This is the cleanest and most professional way to pick up very small crystals.
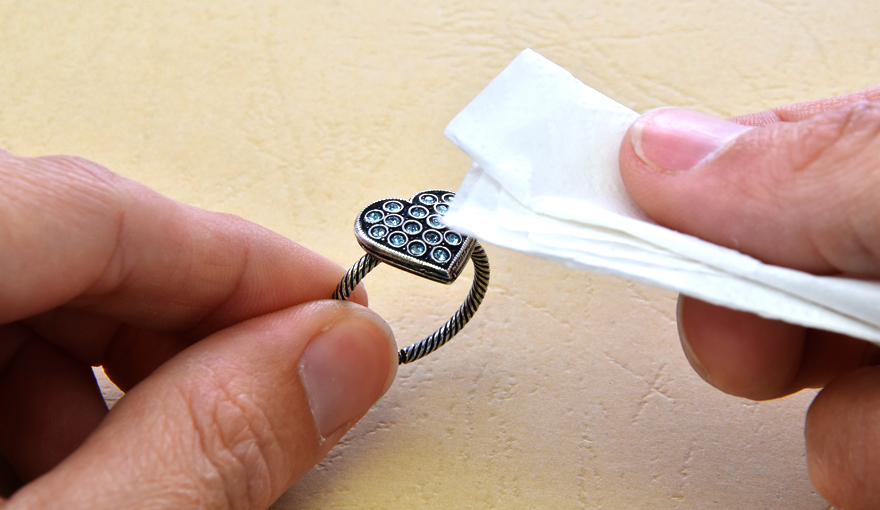
6. Finishing with a clean result
After you have placed all of the crystals, use a soft, clean paper and press gently on the crystals to make sure they sit straight and well in their holes.
The paper will also absorb any extra glue that may be around the crystals.
The glue needs to be all around the crystal in a very delicate circle, but not on top of it.
These types of glue will not change its color. So don’t worry! This glue will not become yellow and will not change the color of the crystal or metal.
7. How long will it take for the glue to completely dry?
CG 500 GLUE
Complete curing time at room temperature, which is about 23°C/73.4°F would take 24 hours.
For a faster drying time, place the metal elements with the crystals in an oven for a few hours.
Complete curing time in oven with 40°C/104°F would be 12 hours, 70°C/158°F would be 2 hours and 100°C/212°F would be 1 hours.
CG 610 GLUE
Complete curing time at room temperature, which is about 23°C/73.4°F would take 72 hours.
Complete curing time in oven with 40°C/104°F would be 12 hours, 70°C/158°F would be 4 hours and 100°C/212°F would be 1.5 hours.
Good luck with your work and creation!
GITA team.