clear all

Type

Gita's magazine
Video tutorials
Step by step DIY
Styling ideas
Learn new Technics
Most popular
Crystals inspiration
Color combinations
Technical questions

Jewelry

Necklace
Bracelet
Earring
Ring
Pendant
Hair Accessorie
Jewelry sets

Techniques

Embedding
Gluing
Beading
Other
Crimp Elements
Stringing

Materials

Cup chain
Stone setting
Metal embedding
Metal casting
Charms
Chains
Swarovski
Cabochons
Beads
Leather
Strings
Pearls
SW rhinestone

Skill level

Beginners
Intermediate
Advanced

Metal Plating

Antique Silver
Antique Silver
Antique Copper
Antique Copper
Antique Brass
Antique Brass
Shiny Silver
Shiny Silver
Gold
Gold
Nickel
Nickel
Rose Gold
Rose Gold
Black
Black
Bronze
Bronze
Noir Black
Misty Gold

Colors

Black
Black
Gray
Gray
White
White
Yellow
Yellow
Orange
Orange
Red
Red
Pink
Pink
Purple
Purple
Blue
Blue
Turquoise
Turquoise
Green
Green
Multi-color
Multi-color
Brown
Brown
Metallic
Metallic
Beige
Beige
Sparkly
Sparkly

Themes

Casual
Basic
Fancy
Bridal
Ethnic
Urban
Young
Vintage
Flowers
Winter
Spring
Summer
Autumn
Christmas
Valentin’s day
Mother’s day
Holidays
Religion
Evening

39ss Necklace with a Heart cup chain Connector

30/11/2014
39ss Necklace with a Heart cup chain Connector


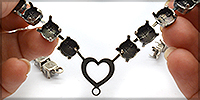
In order to combine the Heart cup chain connector in the necklace i need to take out one setting of the 33 settings of the necklace, so i can  replace it with the Heart connector

I cut the bars of the central setting so now i have to equal parts of the 39ss Necklace 

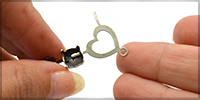
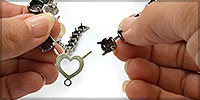
 I put one of the pins of the Heart connector inside the hall of the cup chain setting the way it is shown in the pictures


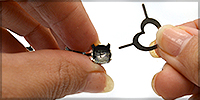
 The next step is securing the connector In order to keep it inside so it won't fall out of the setting

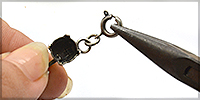
I do it by splitting the end of the pin while it is inside 

the setting of the cup chain

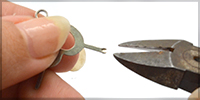
The action is shown in the picture outside of the setting just to show you how to split the end

 of the pin

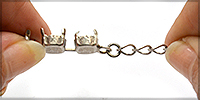
 I repeat the same action with the other side of the Heart connector  to connect the two pieces of cup chain to one necklace


 I connect the 39ss setting base with top loop to the Bottom loop of the Heart connector using a 5mm jump ring and a plier tool


The next step is connecting the extantion chain to the loop on the left side of the necklace  with a 5mm jump ring


I connect the clasp to the loop on the right side of the necklace with a 5mm jump ring


 The last step is setting the stones

I Place the stone in the Center of the stone setting and with the help of the setting tool

bend the prongs towards the stone in order

to embed it

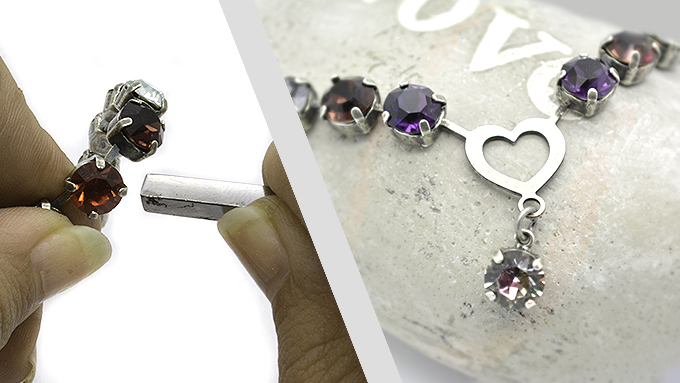
 In this Necklace i used A variety of  Romantic Swarovski  colors you can choose you own combination of colors


Hope you enjoyed the process! 


Title
Plating/Rhinestone
Quantity
Price
Antique Silver(NF)
Antique Silver(NF)
Sale Expires:

1
$26.7

$10.7
5mm Jewelry Jump rings 200 pcs/pack Price for 1 pack 5000253
Antique Silver(NF)
Antique Silver(NF)
Sale Expires:

3
$18.6
Antique Silver(NF)
Antique Silver(NF)
Sale Expires:

1
$8.1

$3.6
39ss stone setting with top loop Price for 1 unit 5000726
Antique Silver(NF)
Antique Silver(NF)
Sale Expires:

1
$2.9

$1.2
6mm Spring clasp 5pcs pack Price for 1 pack 5001895
Antique Silver(NF)
Antique Silver(NF)
Sale Expires:

1
$5.3

Related Tutorials:

Fresh colors of green & blue inspiration
Take a look at this fresh green and blue color for the 12mm Rivoli stone settings jewelry collection
Styling ideas
Dark Turquoise & Emerald jewelry set inspiration
Step by step DIY

Help us improve our school

Was the information Usefull? Yes No
Name:
Email Address:
Which other tutorials or articles would you like to see
Please note any suggestions for improvements for us to get better?

Please Wait

Succuess

Error Failed

0.7557069