clear all

Type

Gita's magazine
Video tutorials
Step by step DIY
Styling ideas
Learn new Technics
Most popular
Crystals inspiration
Color combinations
Technical questions

Jewelry

Necklace
Bracelet
Earring
Ring
Pendant
Hair Accessorie
Jewelry sets

Techniques

Embedding
Gluing
Beading
Other
Crimp Elements
Stringing

Materials

Cup chain
Stone setting
Metal embedding
Metal casting
Charms
Chains
Swarovski
Cabochons
Beads
Leather
Strings
Pearls
SW rhinestone

Skill level

Beginners
Intermediate
Advanced

Metal Plating

Antique Silver
Antique Silver
Antique Copper
Antique Copper
Antique Brass
Antique Brass
Shiny Silver
Shiny Silver
Gold
Gold
Nickel
Nickel
Rose Gold
Rose Gold
Black
Black
Bronze
Bronze
Noir Black
Misty Gold

Colors

Black
Black
Gray
Gray
White
White
Yellow
Yellow
Orange
Orange
Red
Red
Pink
Pink
Purple
Purple
Blue
Blue
Turquoise
Turquoise
Green
Green
Multi-color
Multi-color
Brown
Brown
Metallic
Metallic
Beige
Beige
Sparkly
Sparkly

Themes

Casual
Basic
Fancy
Bridal
Ethnic
Urban
Young
Vintage
Flowers
Winter
Spring
Summer
Autumn
Christmas
Valentin’s day
Mother’s day
Holidays
Religion
Evening

Stone setting and Agate beads combined bracelet tutorial

Stone setting and Agate beads combined bracelet tutorial

28/10/2015
Stone setting and  Agate beads combined bracelet tutorial


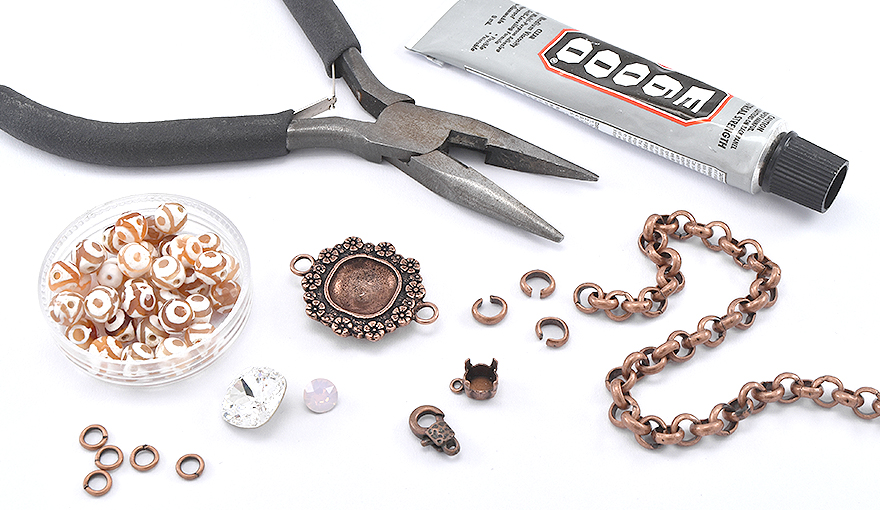
step 1: Prepare your materials

Prepare your work environment. Organizing your tools and materials will help

you work faster and more efficient.


Step 2 : Creating the bracelet

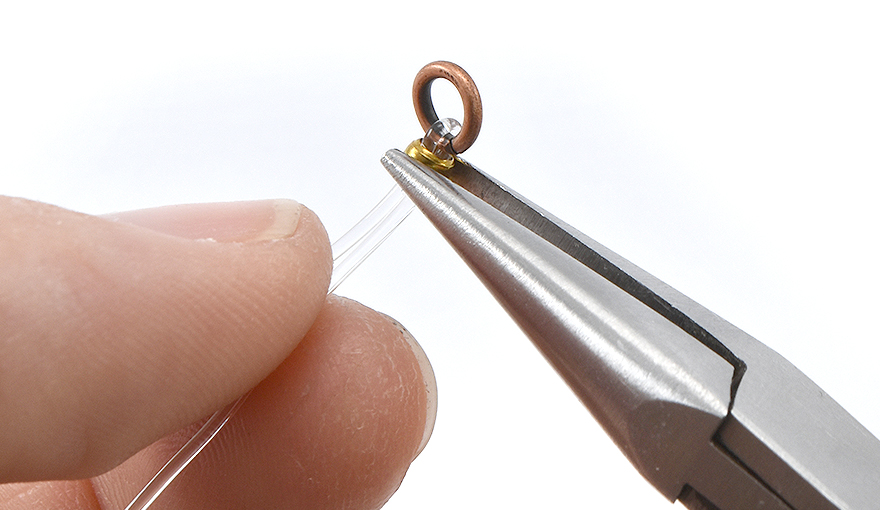
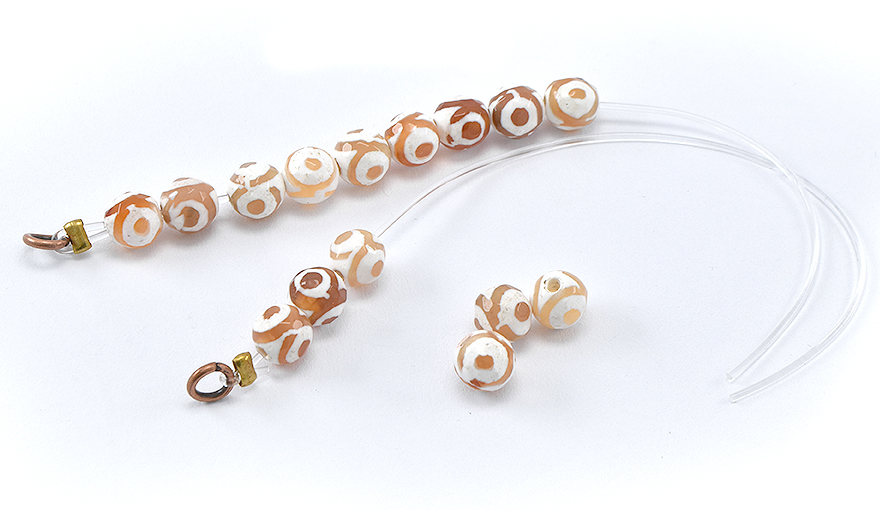
Make a loop from the thread on the jump ring, with one crimp bead that holds that loop.

Press with a plier tool on the small crimp bead to hold the thread in place.


Slide 10 Agate beads on each thread.


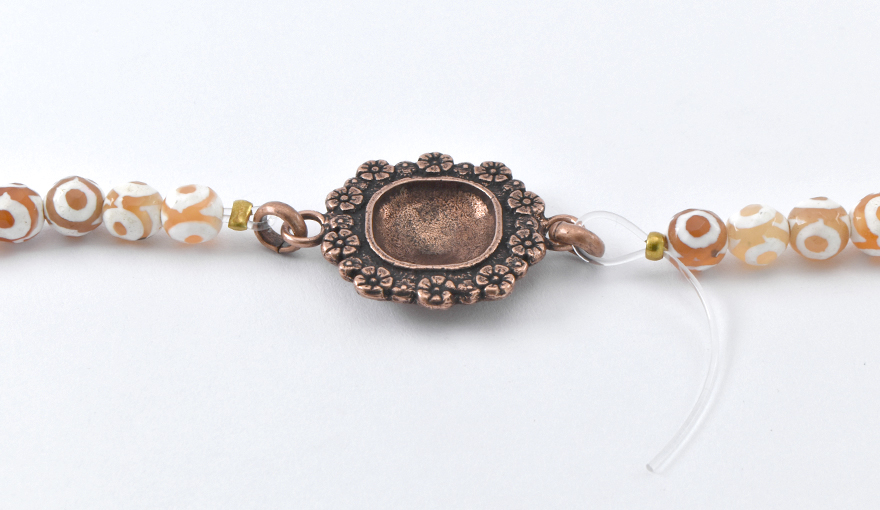
Close the big chain loop on the loop of the stone setting with a plier tool.


To close the bracelet, make another loop with the thread on the big loop on each side of the stone setting and close the crimp beads tightly so that the thread will not open.


Step 3 : Closing the bracelet

Now open one jump ring on one side and connect the clasp.

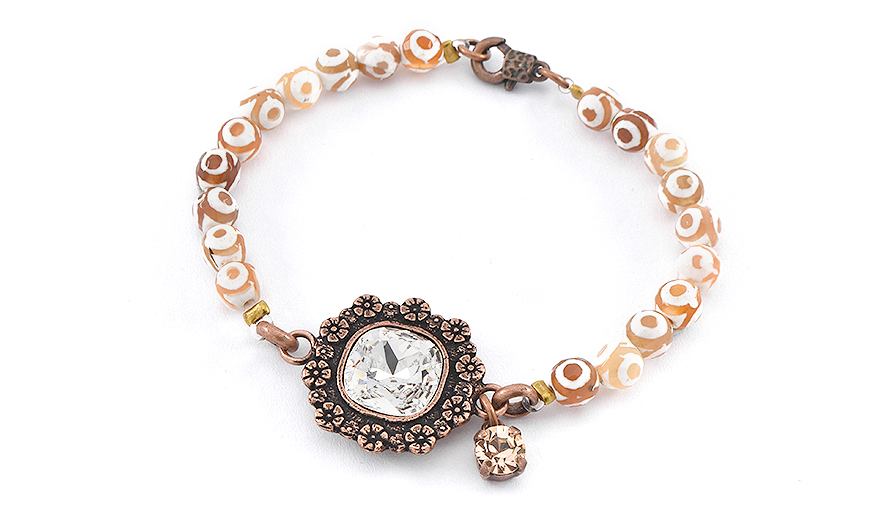
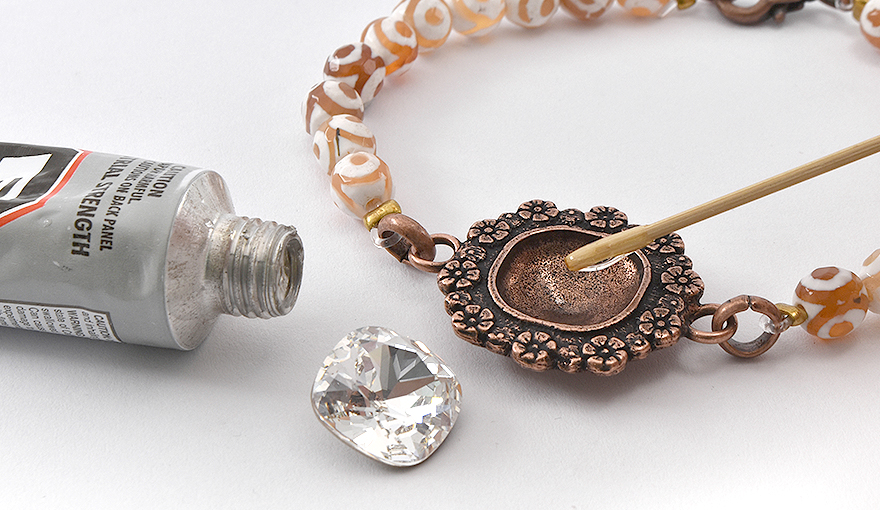
Use E6000 glue to embed the stone in the stone setting, and hang the small 29ss stone on the loop of the center stone setting for an extra shiny detail to this bracelet.


wonderful!

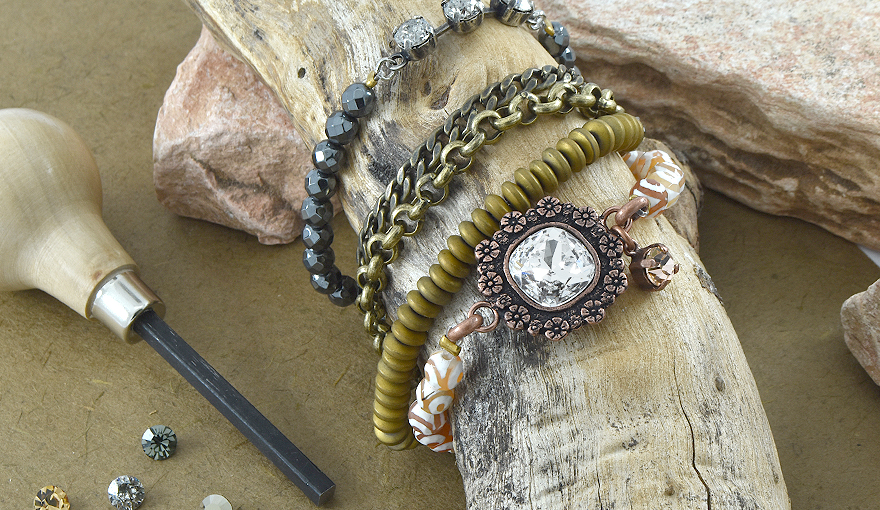
The bracelet is ready!

Enjoy your new beautiful Swarovski bracelet.

Gita team.

Title
Plating/Rhinestone
Quantity
Price
29ss with one top loop Price for 1 unit 5006473
Sale Expires:

0
$0.0
5.7mm Rolo chain Price for 1 pack 5000884
Sale Expires:

0
$0.0

$0.0
12mm Decorated clasps - 5pcs pack Price for 1 pack 5003617
Sale Expires:

0
$0.0
5mm Jewelry Jump rings 200 pcs/pack Price for 1 pack 5000253
Sale Expires:

0
$0.0

Related Tutorials:

JUNE’s Birthstone - Pearl jewelry making
Creating gorgeous jewelry with JUNE’s Birthstones - Swarovski peals and moonstone crystals
Step by step DIY
“Made with love” necklace
Creating a meaningful charm silver necklace with fairy red Swarovski crystals
Step by step DIY
Tips for making DIY Easter jewelry
Creating specially designed jewelry items for Easter is much easier than you would think - take a lo...
Gita's magazine

Help us improve our school

Was the information Usefull? Yes No
Name:
Email Address:
Which other tutorials or articles would you like to see
Please note any suggestions for improvements for us to get better?

Please Wait

Succuess

Error Failed

0.7004403