clear all

Type

Gita's magazine
Video tutorials
Step by step DIY
Styling ideas
Learn new Technics
Most popular
Crystals inspiration
Color combinations
Technical questions

Jewelry

Necklace
Bracelet
Earring
Ring
Pendant
Hair Accessorie
Jewelry sets

Techniques

Embedding
Gluing
Beading
Other
Crimp Elements
Stringing

Materials

Cup chain
Stone setting
Metal embedding
Metal casting
Charms
Chains
Swarovski
Cabochons
Beads
Leather
Strings
Pearls
SW rhinestone

Skill level

Beginners
Intermediate
Advanced

Metal Plating

Antique Silver
Antique Silver
Antique Copper
Antique Copper
Antique Brass
Antique Brass
Shiny Silver
Shiny Silver
Gold
Gold
Nickel
Nickel
Rose Gold
Rose Gold
Black
Black
Bronze
Bronze
Noir Black
Misty Gold

Colors

Black
Black
Gray
Gray
White
White
Yellow
Yellow
Orange
Orange
Red
Red
Pink
Pink
Purple
Purple
Blue
Blue
Turquoise
Turquoise
Green
Green
Multi-color
Multi-color
Brown
Brown
Metallic
Metallic
Beige
Beige
Sparkly
Sparkly

Themes

Casual
Basic
Fancy
Bridal
Ethnic
Urban
Young
Vintage
Flowers
Winter
Spring
Summer
Autumn
Christmas
Valentin’s day
Mother’s day
Holidays
Religion
Evening

Heart Spring Necklace

Heart Spring Necklace

03/05/2015
Heart Spring Necklace


step 1: preparing your materials


Prepare your work environment. Organizing your tools and materials will help

you work faster and more efficient.


I choose oval 9X7mm flat loops chain and cut 2 pieces of 10mm long each.


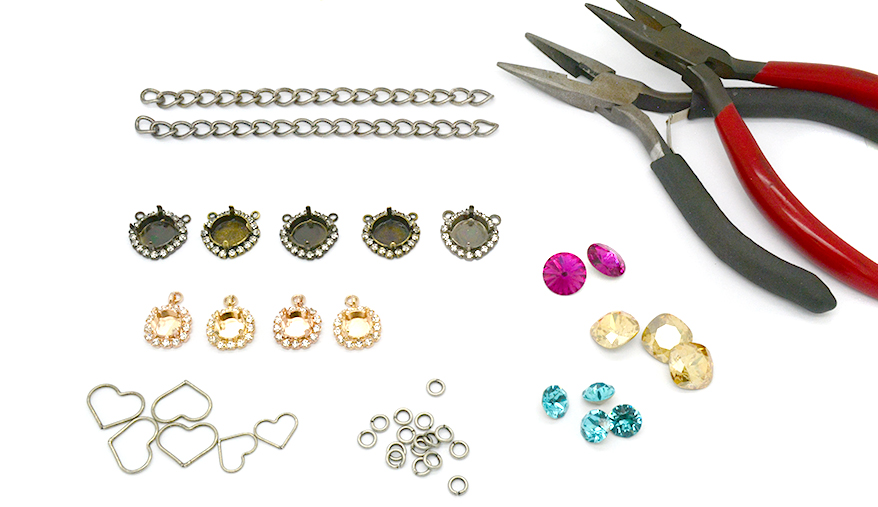
To create this necklace I choose “heart chain” by using a cutting tool I cut and seperate 4 big hearts and 2 small ones. The heart links must be closed.


Of course, you are free to use any other shape of chain in order to create this necklace.


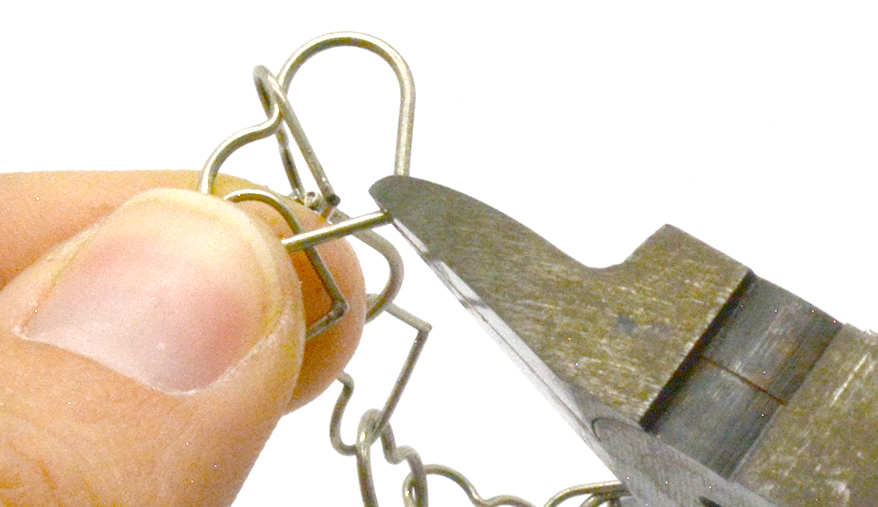
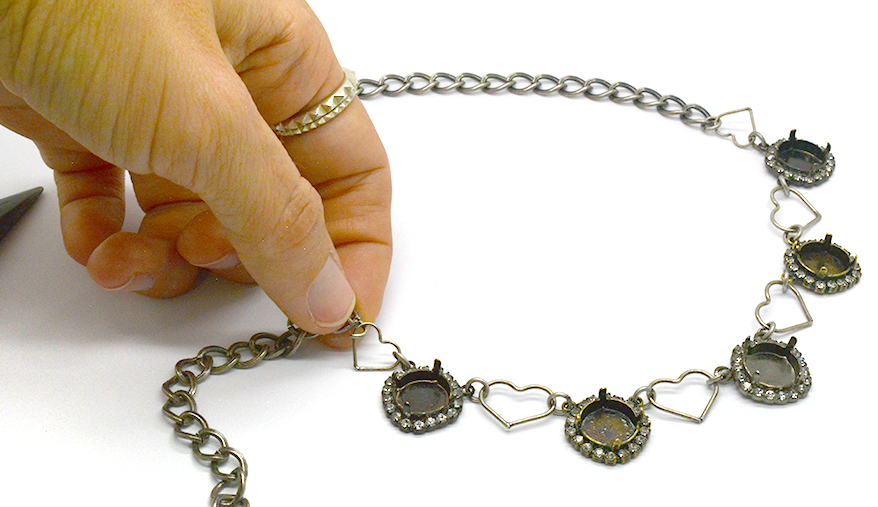
Step 2: connecting the necklace base


Use plier tool to open 5 mm jump ringsand connect the big heart link with the 14 mm rivoli stone setting.


Connect all of the 4 big heart links in the center of the necklace, and place the smaller heart links at the far end of the center piece.

Now you can connect the small heart link and a 10 cm long chain on each side.


Connect the clasp with the same 5 mm jump ring, by opining and closing them with the plaier tool.


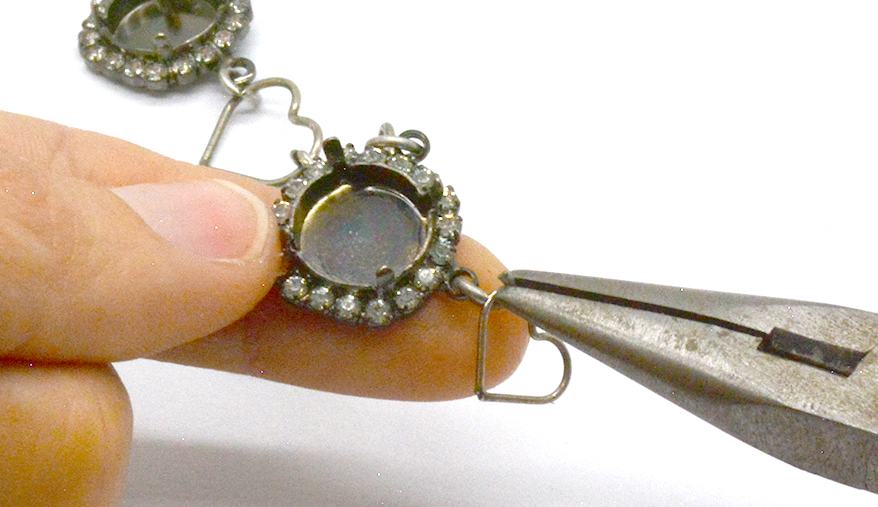
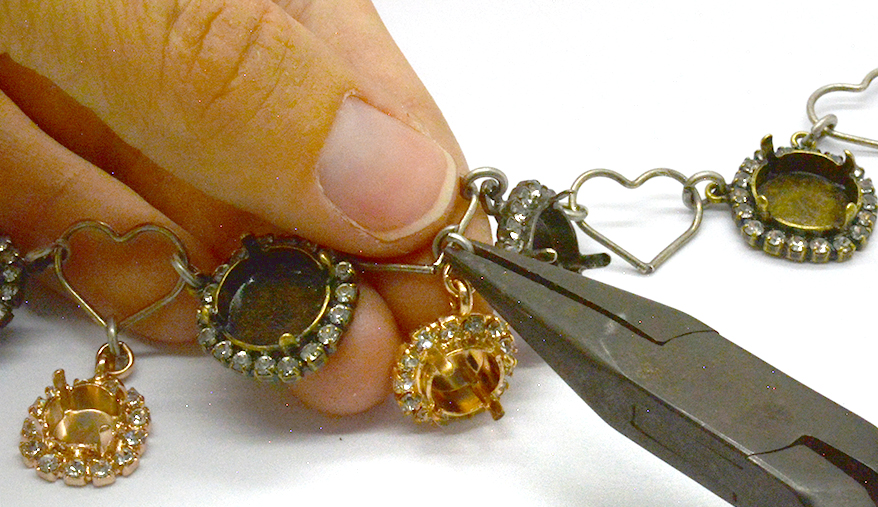
Step 3: Connecting the Stone settings to the necklace base


Take the 39ss stone setting, and by using jump rings connect them to the buttom of the big heart links.

Do this with all 4 big harts


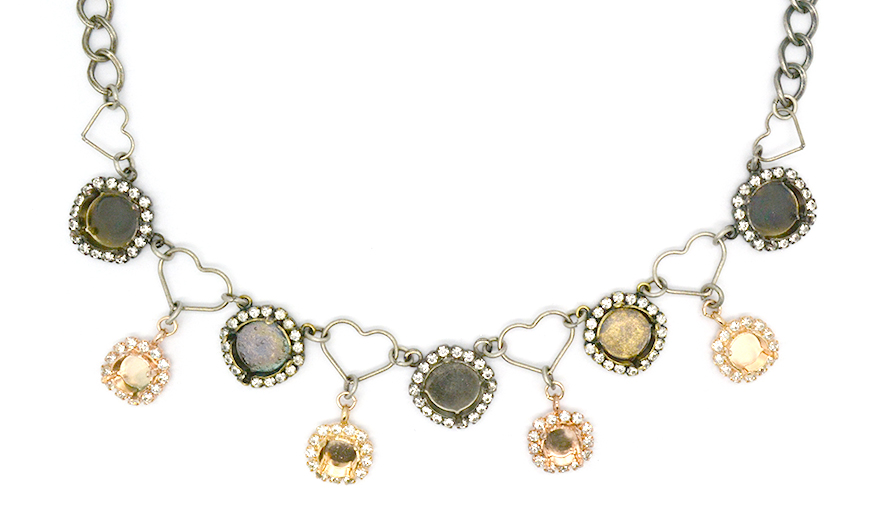
The base of the necklace is ready! Well done.


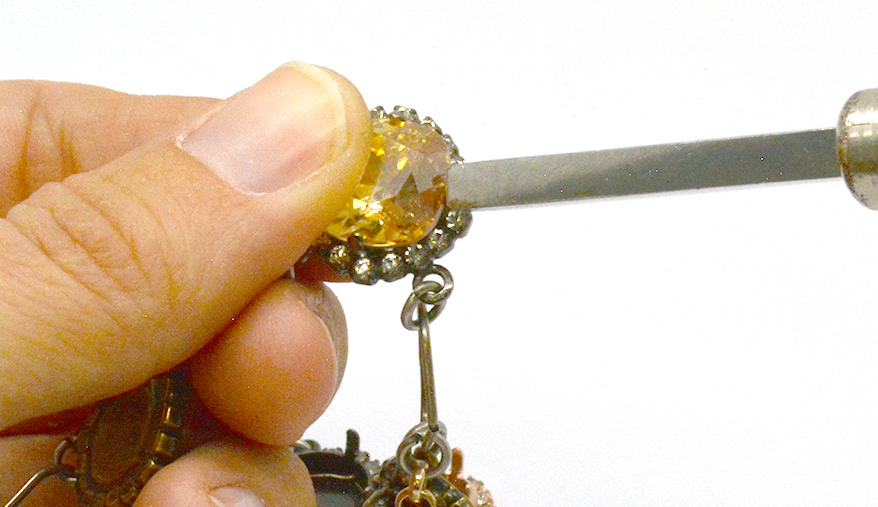
Step 4: Setting the stones


The last step is setting the stones.

Place the stone in the center of the stone setting and with the help of the setting tool bend the prongs towards the stone in order to embed it.

Bend the prongs gently to make sure you don't damage the stone or crack the plating in this process.


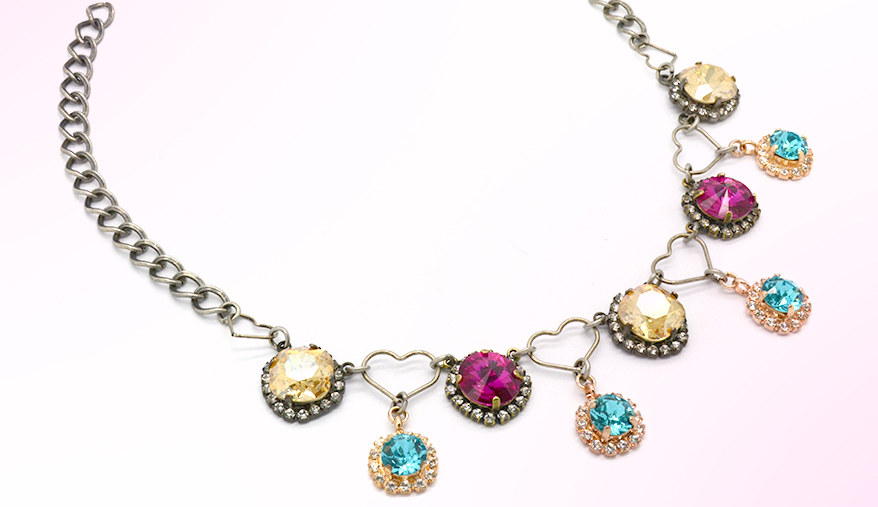
I used spring color combination with fuchsia, golden shadow and blue zircon. to create a more glamours look, you can use silver shad with crystal colors to your preferance.


Enjoy your new beautiful Swarovski necklace!

Gita team.


Title
Plating/Rhinestone
Quantity
Price
9x7mm Wave Oval link chain Price for 1 pack 5001423
Antique Silver(NF)
Antique Silver(NF)
Sale Expires:

0
$0.0

$0.0
5mm Jewelry Jump rings 200 pcs/pack Price for 1 pack 5000253
Antique Silver(NF)
Antique Silver(NF)
Sale Expires:

0
$0.0
Antique Silver(NF)
Antique Silver(NF)
Sale Expires:

0
$0.0

Related Tutorials:

Help us improve our school

Was the information Usefull? Yes No
Name:
Email Address:
Which other tutorials or articles would you like to see
Please note any suggestions for improvements for us to get better?

Please Wait

Succuess

Error Failed

0.8549696