clear all

Type

Gita's magazine
Video tutorials
Step by step DIY
Styling ideas
Learn new Technics
Most popular
Crystals inspiration
Color combinations
Technical questions

Jewelry

Necklace
Bracelet
Earring
Ring
Pendant
Hair Accessorie
Jewelry sets

Techniques

Embedding
Gluing
Beading
Other
Crimp Elements
Stringing

Materials

Cup chain
Stone setting
Metal embedding
Metal casting
Charms
Chains
Swarovski
Cabochons
Beads
Leather
Strings
Pearls
SW rhinestone

Skill level

Beginners
Intermediate
Advanced

Metal Plating

Antique Silver
Antique Silver
Antique Copper
Antique Copper
Antique Brass
Antique Brass
Shiny Silver
Shiny Silver
Gold
Gold
Nickel
Nickel
Rose Gold
Rose Gold
Black
Black
Bronze
Bronze
Noir Black
Misty Gold

Colors

Black
Black
Gray
Gray
White
White
Yellow
Yellow
Orange
Orange
Red
Red
Pink
Pink
Purple
Purple
Blue
Blue
Turquoise
Turquoise
Green
Green
Multi-color
Multi-color
Brown
Brown
Metallic
Metallic
Beige
Beige
Sparkly
Sparkly

Themes

Casual
Basic
Fancy
Bridal
Ethnic
Urban
Young
Vintage
Flowers
Winter
Spring
Summer
Autumn
Christmas
Valentin’s day
Mother’s day
Holidays
Religion
Evening

Metal chains necklace

Metal chains necklace

15/05/2015
Metal chains necklace


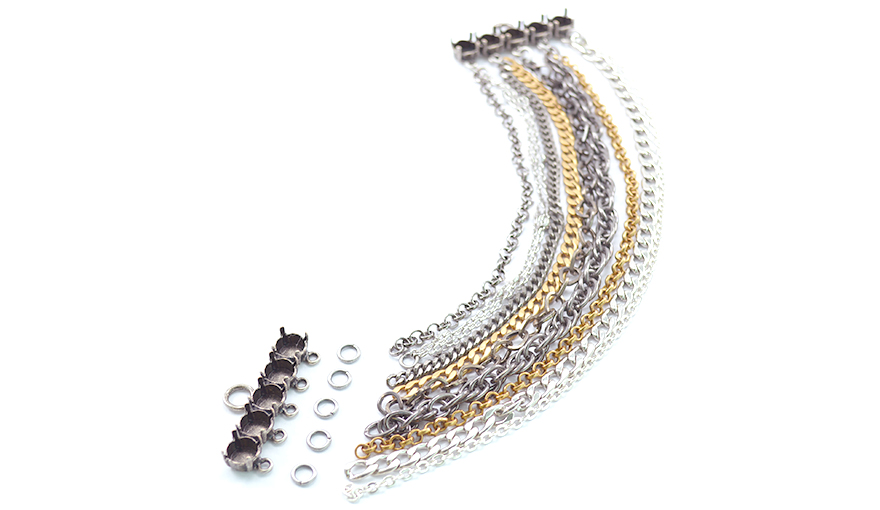
step 1: preparing your materials

Prepare your work environment. Organizing your tools and materials will help

you work faster and more efficient.


Step 2: cutting the chains

choose a few different kinds of chains to create this necklace.

cut the chains using the cutting tool.


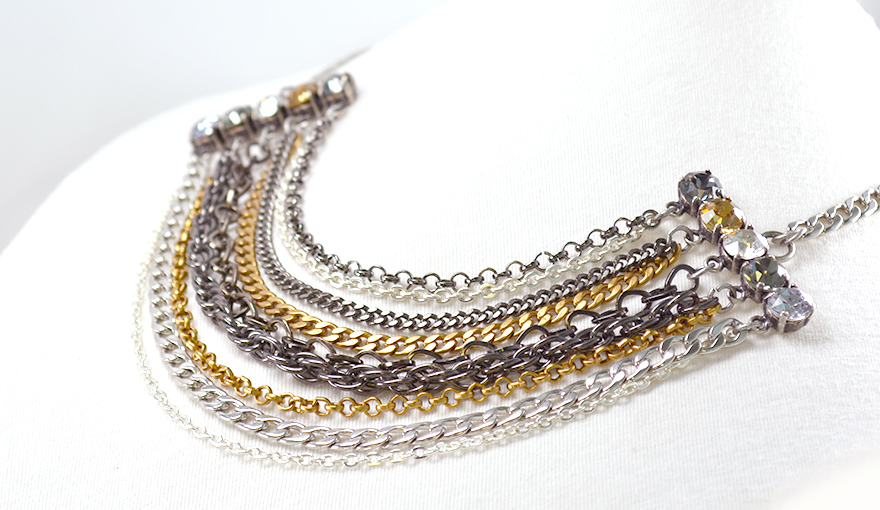
The top and shortest chain is 12cm long, cut each chain 1cm longer then the one before.


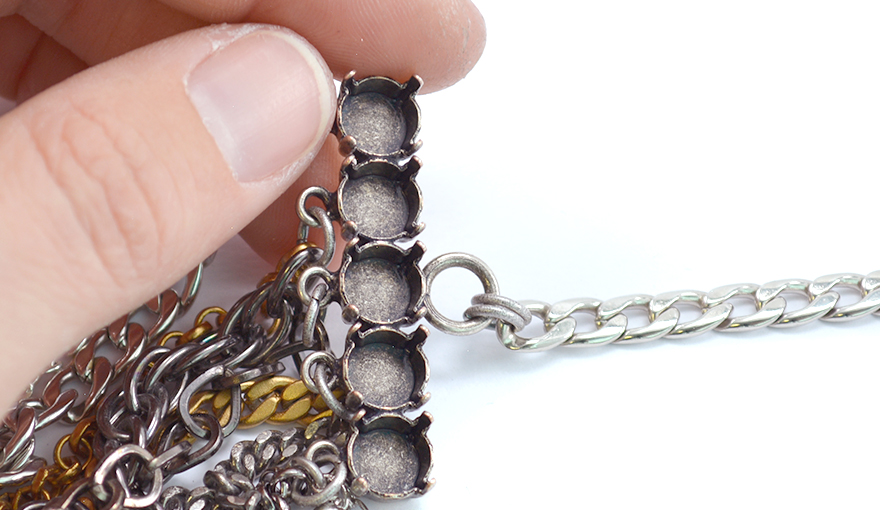
Step 3: hanging all the chains


divide the chains to 5 groups that will be hanged on the 5 loops on the end connector with 5 settings of 39ss.


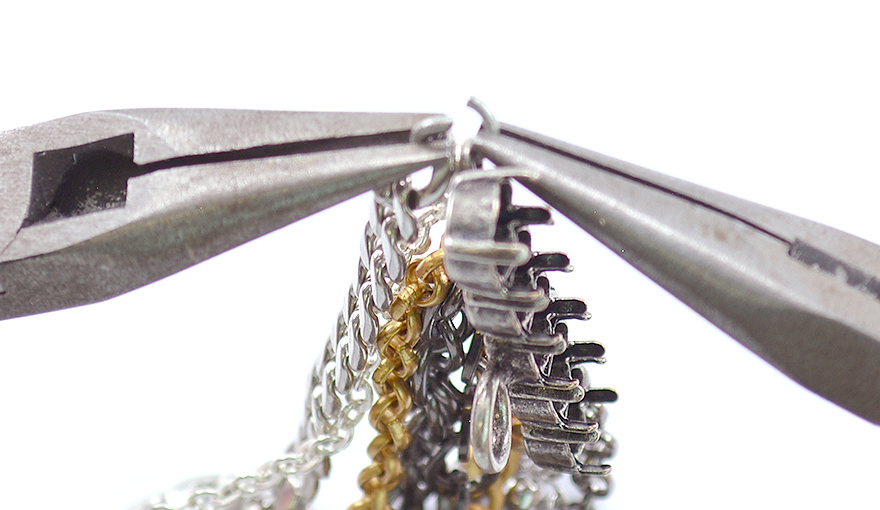
Open 6mm jump ring and hang two chains on it, the shorter chain on top of the longer one.


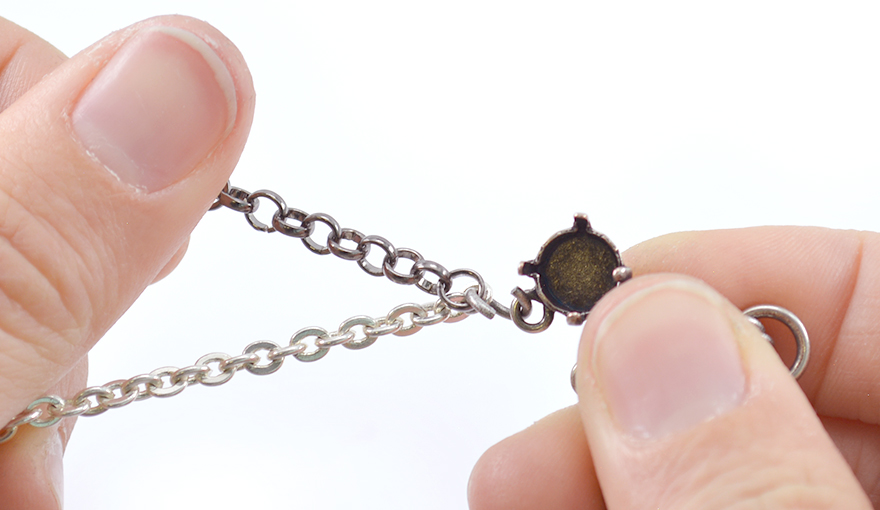
Close and open the jump rings using two pleir tools.


Hang the chains in the same order on the other end of the connector.


Step 4: connecting the necklace

cut 12cm of flat gourmet chain.

connect the clasp with 6mm jump ring, and the other end of the flat gourmet chain to the big loop on the end connector.

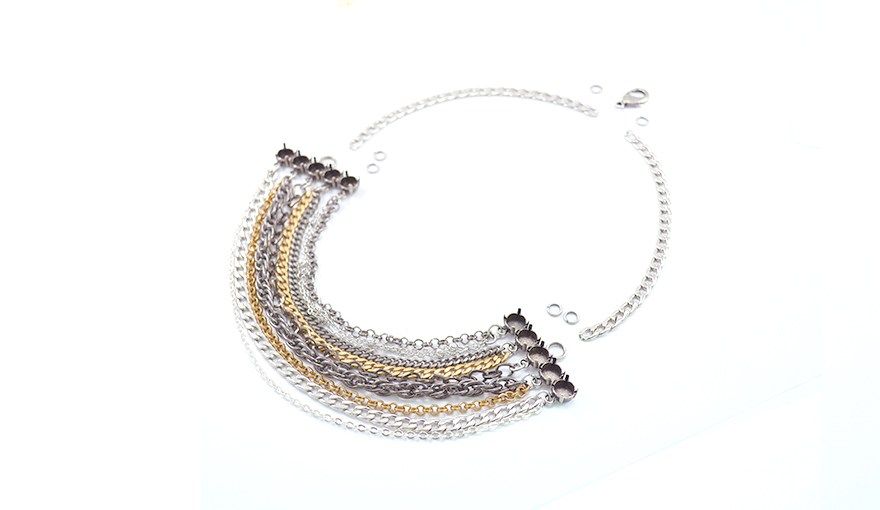
I used 2 jump rings so it will not move so much.


Step 5 : setting the stones

Place the stone in the center of the stone setting and with the help of the setting tool bend the prongs towards the stone in order to embed it.

Bend the prongs gently to make sure you don't damage the stone or crack the plating in this process.


Great!

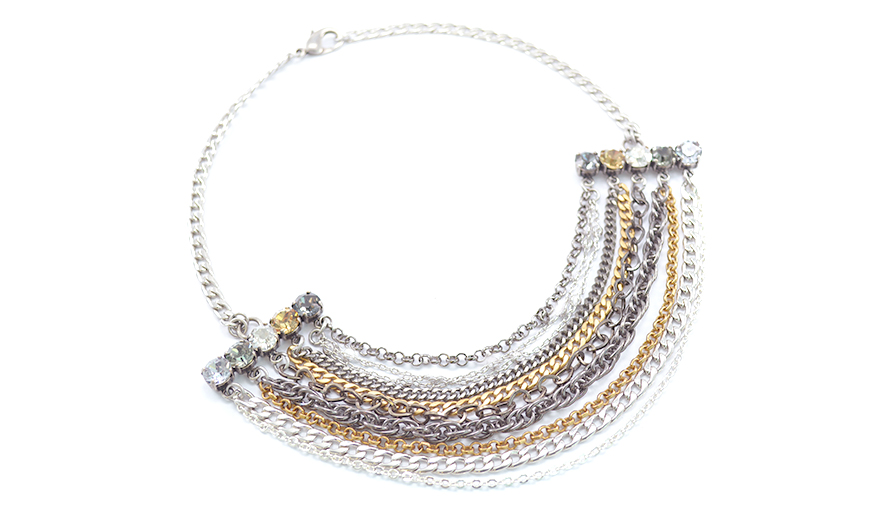
The necklace is ready!

Enjoy your new beautiful Swarovski necklace.

Gita team.


Title
Plating/Rhinestone
Quantity
Price
6.9mm Double curb chain Price for 1 pack 5001421
Black (NF)
Black (NF)
Sale Expires:

0
$0.0
5x3.6mm Oval rolo chain Price for 1 pack 5001419
Black (NF)
Black (NF)
Sale Expires:

0
$0.0
6mm Rope chain Price for 1 pack 5001420
Black (NF)
Black (NF)
Sale Expires:

0
$0.0
5x3.6mm Oval rolo chain Price for 1 pack 5001419
Sale Expires:

0
$0.0
Flat Gourmet chain 4.5mm Price for 1 pack 5001416
Sale Expires:

0
$0.0
3.7x3mm Oval link chain Price for 1 pack 5001951
Nickel/Rhodium color(NF)
Sale Expires:

0
$0.0
19mm Clasps 5pcs pack Price for 1 pack 5001415
Antique Silver(NF)
Antique Silver(NF)
Sale Expires:

0
$0.0
39ss Ends connector 5 settings each Price for 1 pack 5001764
Antique Silver(NF)
Antique Silver(NF)
Sale Expires:

0
$0.0

Related Tutorials:

Mother’s day jewelry inspirations
Here are a few ideas on how to create simple but beautiful jewelry pieces for the upcoming Mother’s ...
Gita's magazine
Charms and agate beads bracelet inspiration
Step by step DIY
DIY choker necklaces inspiration
Here you can see a special and beautiful inspiration that we made to show you how easy it is to crea...
Gita's magazine

Help us improve our school

Was the information Usefull? Yes No
Name:
Email Address:
Which other tutorials or articles would you like to see
Please note any suggestions for improvements for us to get better?

Please Wait

Succuess

Error Failed

0.6796748