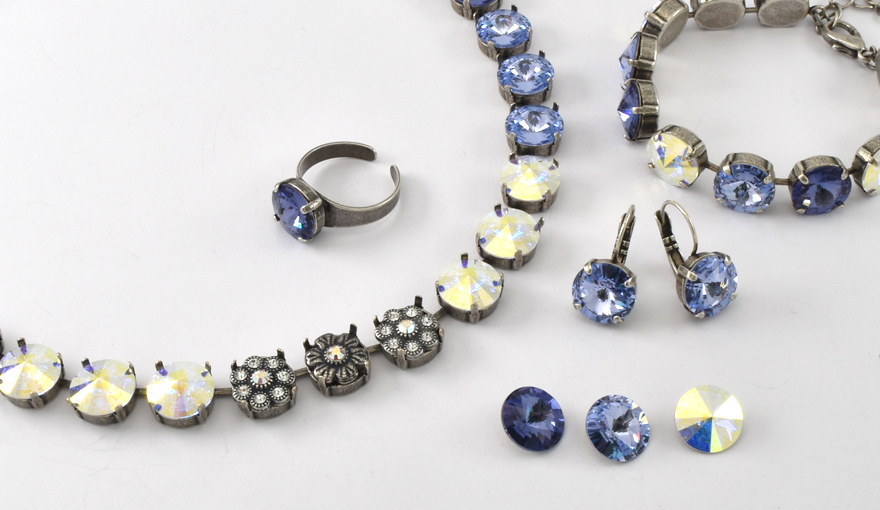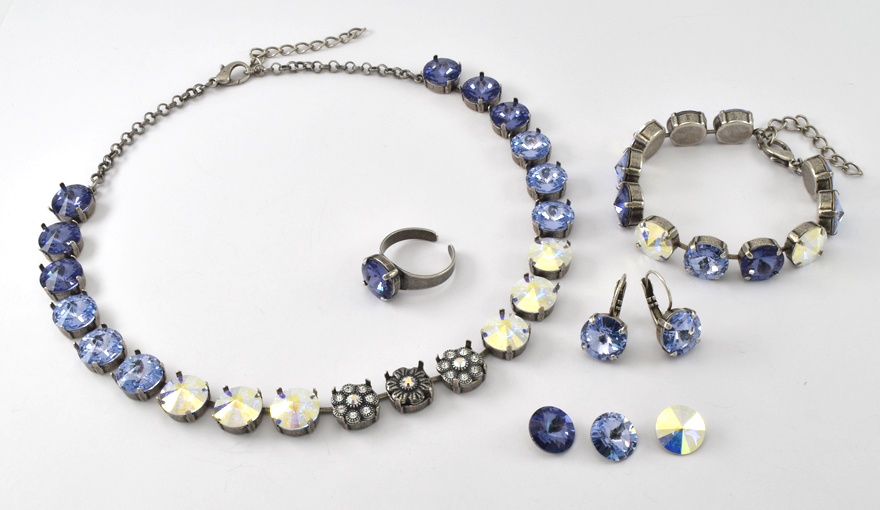
This Kit is created especially for beginner designers how want's to create a complete set with Swarovski crystals.
The Kit has all the ingredients to make a beautiful set with the choice of 4 different color combinations
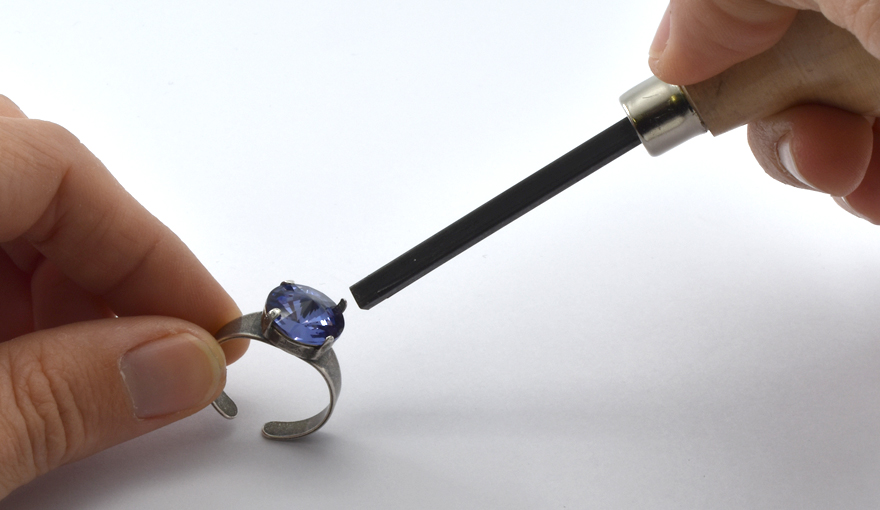
Ring: Set the stone
Choose one stone and place it inside the stone setting and set the stone with the help of the prong pusher tool.
Simply push the metal prongs on the stone using the Prong pusher tool.
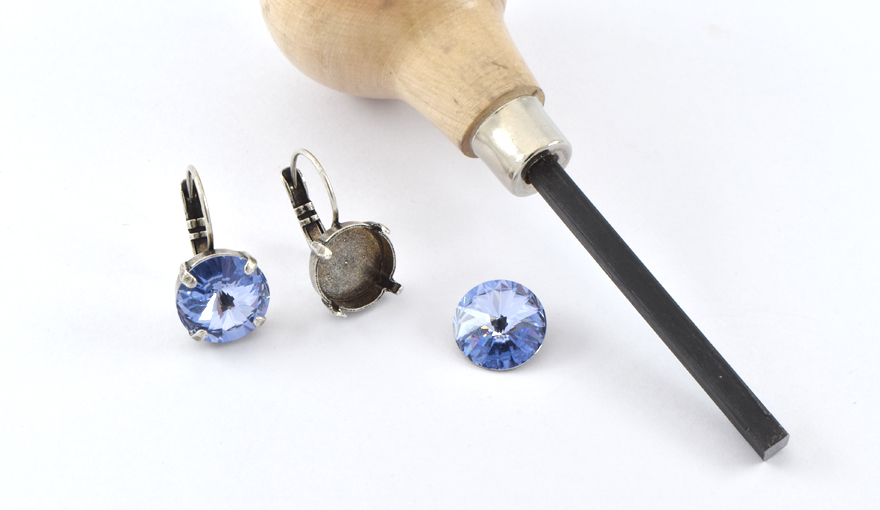
Earrings: Setting the stones
Choose one of three colors from the Swarovski crystals in the kit for these earrings.
Place the stone in the stone setting of the earring, and hold it in place.
Use the prong pusher tool in order to embed the crystal stones, as shown before.
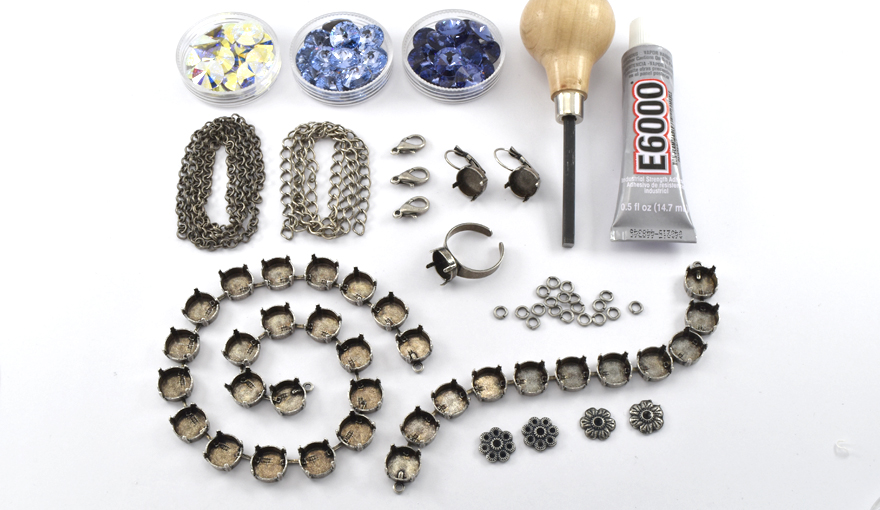
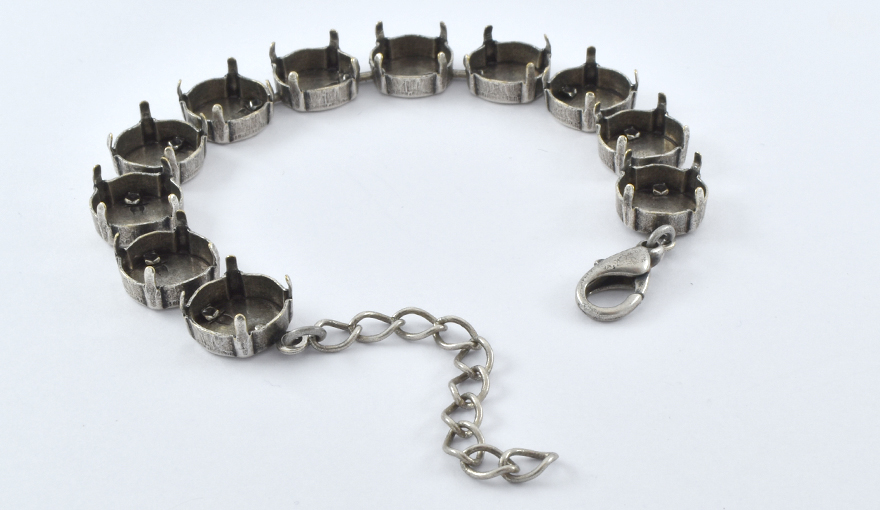
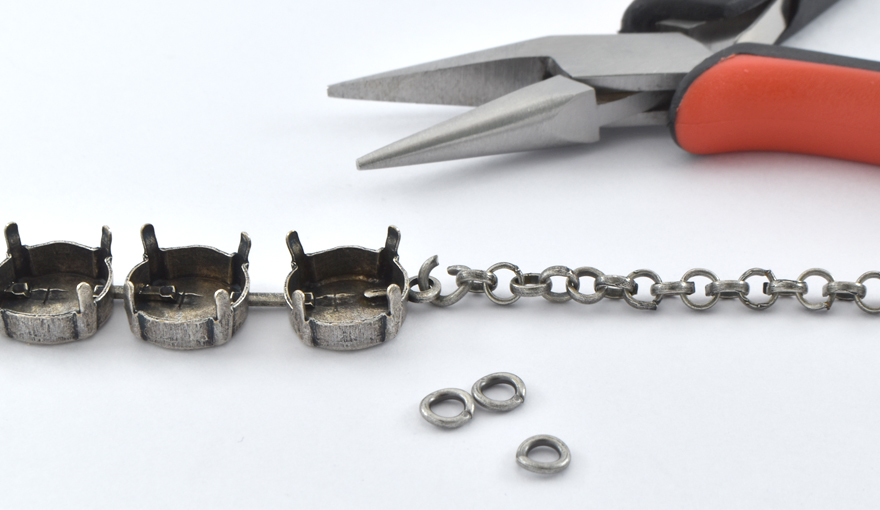
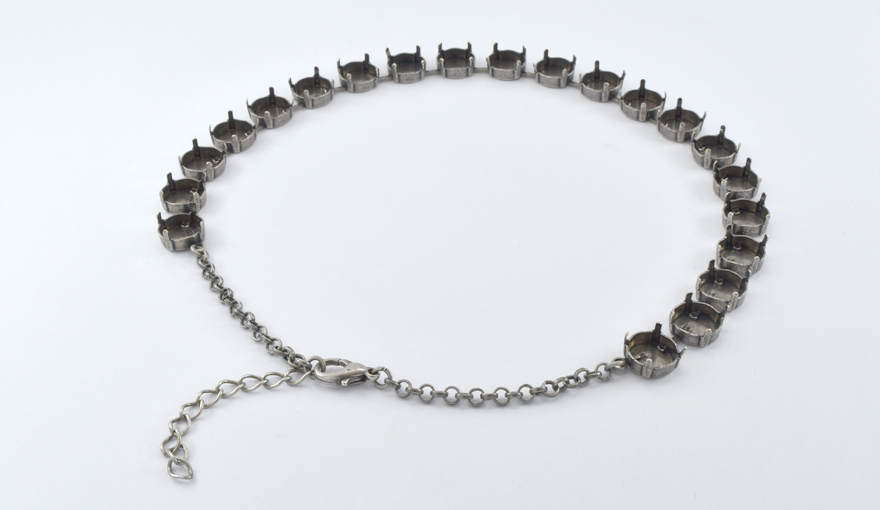
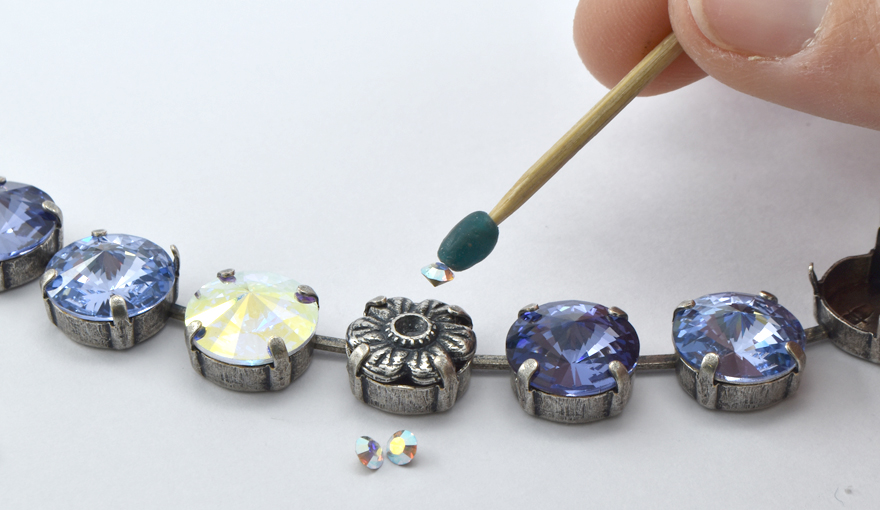
Bracelet: Creating the bracelet
The bracelet is made from an empty bracelet cup chain, a clasp and a small part of an
extension chain.
Use a cutting tool and cut a 5cm piece of the
extension chain.
Tip: hold the end of the cutting tool away from you and cover it with your hand to protect your eyes!
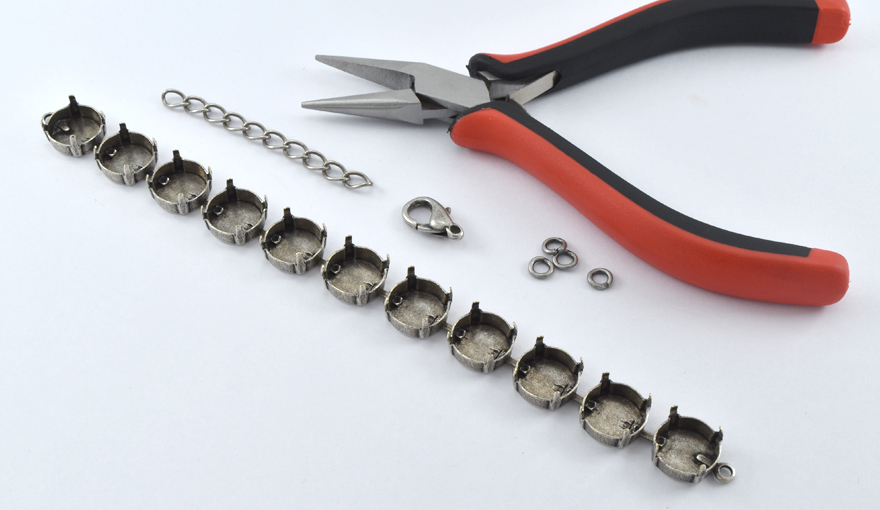
Open 5mm jump rings with the help of two plier tools.
Connect the extension chain and clasp on each side of the bracelet cup chain using the small jump rings that you have opened.

Now, you only need to place the crystals in the bracelet and set them as shown in the ring instructions.
Necklace: Creating the necklace
The necklace is made from a cup chain center piece, round loop chain, a clasp and a small part of an extension chain.
Start by cutting a 5cm piece of the extension chain, with the cutting tool.
Also cut 2 parts from the round loop chain – 5cm each.
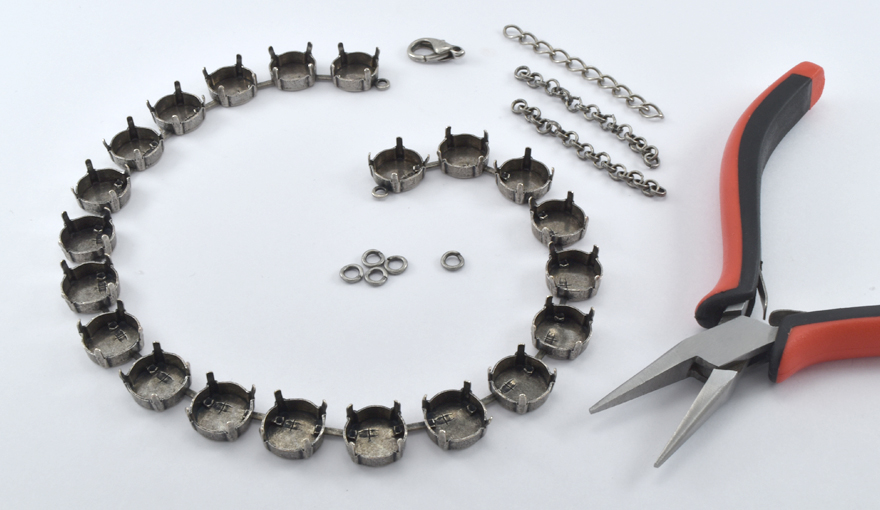
Open the jump rings using the plier tools, and close them to connect the round loops chains on each side of the necklace center piece.
The clasp needs to be connected on the right side of the necklace, and the extension chain on the left side.
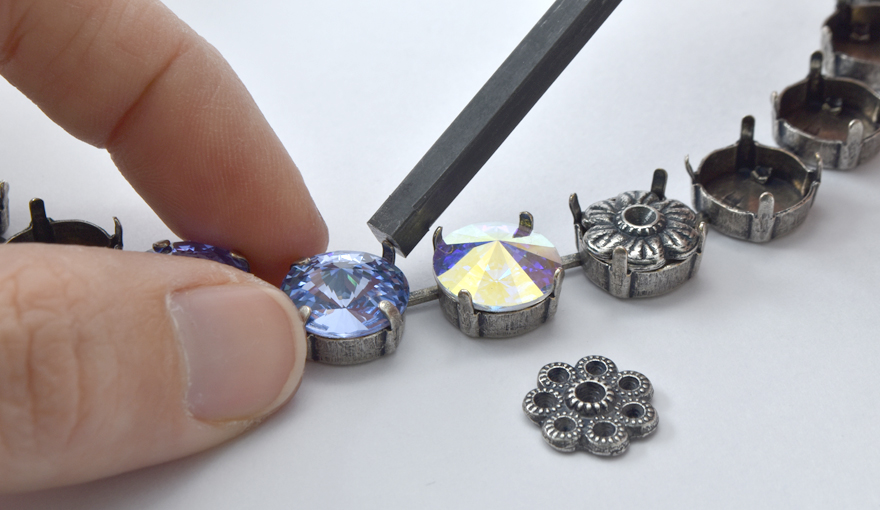
Setting the stones and embedding elements
The embedding elements are embedded in the cup chain in the same way as the crystals do.
Place the stones and embedding elements into the stone settings and set them in place.
Apply small amount of E6000 glue.
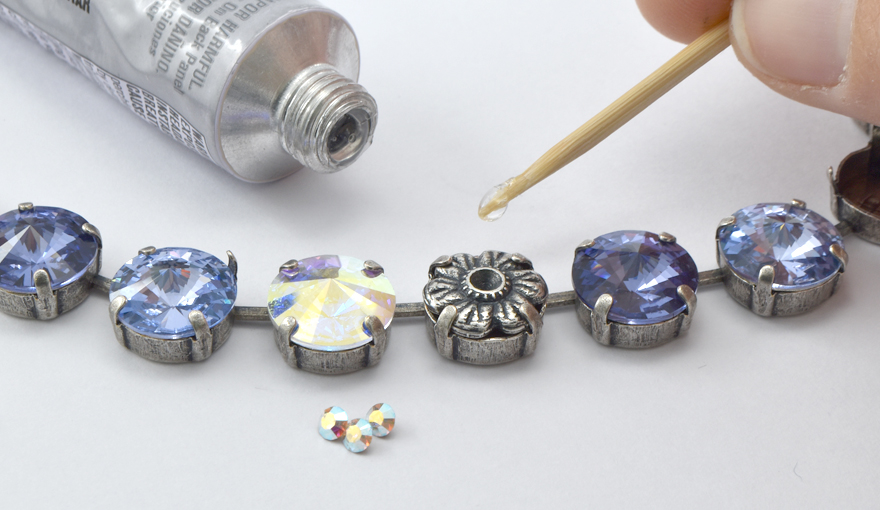
e the small stones in their place, and let the glue dry for a few minets.
Great Work!
Enjoy your new beautiful Swarovski set.
Gita team.