clear all

Type

Gita's magazine
Video tutorials
Step by step DIY
Styling ideas
Learn new Technics
Most popular
Crystals inspiration
Color combinations
Technical questions

Jewelry

Necklace
Bracelet
Earring
Ring
Pendant
Hair Accessorie
Jewelry sets

Techniques

Embedding
Gluing
Beading
Other
Crimp Elements
Stringing

Materials

Cup chain
Stone setting
Metal embedding
Metal casting
Charms
Chains
Swarovski
Cabochons
Beads
Leather
Strings
Pearls
SW rhinestone

Skill level

Beginners
Intermediate
Advanced

Metal Plating

Antique Silver
Antique Silver
Antique Copper
Antique Copper
Antique Brass
Antique Brass
Shiny Silver
Shiny Silver
Gold
Gold
Nickel
Nickel
Rose Gold
Rose Gold
Black
Black
Bronze
Bronze
Noir Black
Misty Gold

Colors

Black
Black
Gray
Gray
White
White
Yellow
Yellow
Orange
Orange
Red
Red
Pink
Pink
Purple
Purple
Blue
Blue
Turquoise
Turquoise
Green
Green
Multi-color
Multi-color
Brown
Brown
Metallic
Metallic
Beige
Beige
Sparkly
Sparkly

Themes

Casual
Basic
Fancy
Bridal
Ethnic
Urban
Young
Vintage
Flowers
Winter
Spring
Summer
Autumn
Christmas
Valentin’s day
Mother’s day
Holidays
Religion
Evening

A simple way to mix the Swarovski glue

A simple way to mix the Swarovski glue

12/09/2016
A simple way to mix the Swarovski glue

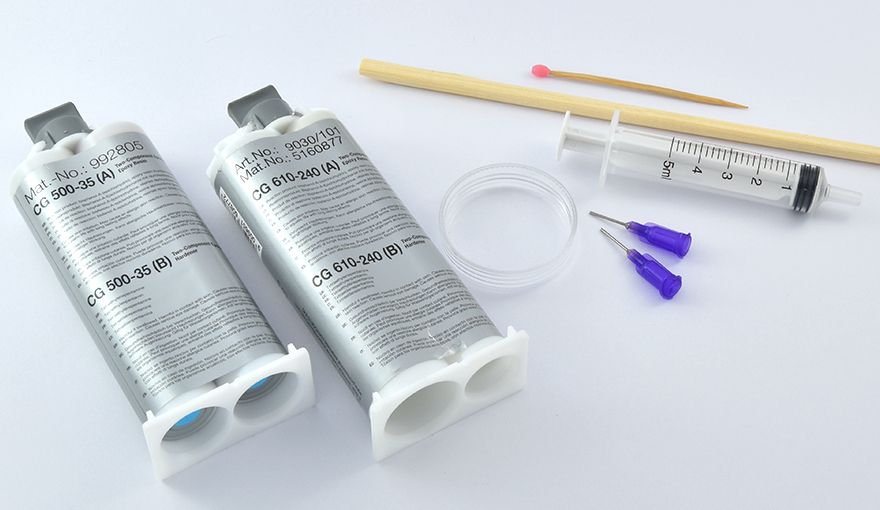
Here are all of the things you need to use this special Swarovski glue for crystal, in the most simple and easy way that would also help you work with clean and accuracy.


1. Press the two tubes together to pull out the two components.


When you need to glue 24ss\4mm or larger crystals use the CG610 glue that needs to be mixed in a ratio of 1:1.
When you need to glue smaller size crystals from like 8pp 0r 14pp crystals use the CG500 glue that needs to be mixed in a ratio of 1:2.


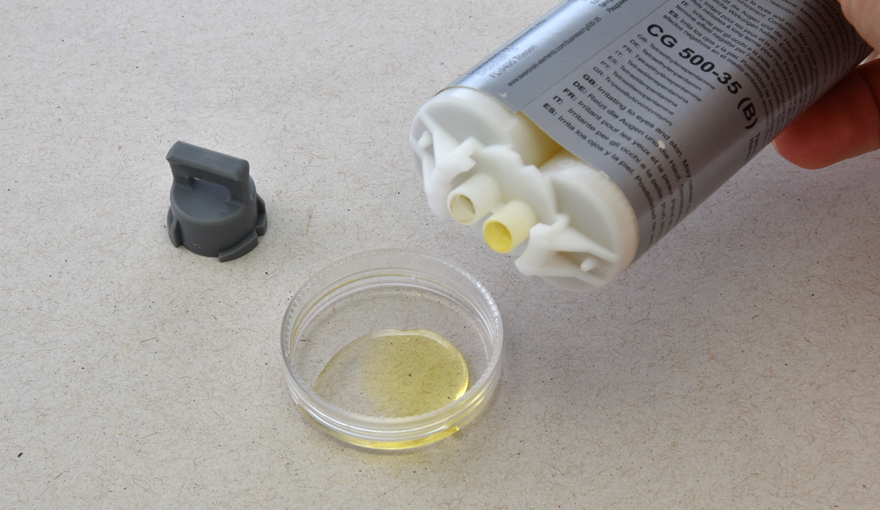
2. Mix the two components until a homogenous result is achieved.


Mixing this two-component glue is especially important. Only a fully homogenous mixture leads to the desired results.


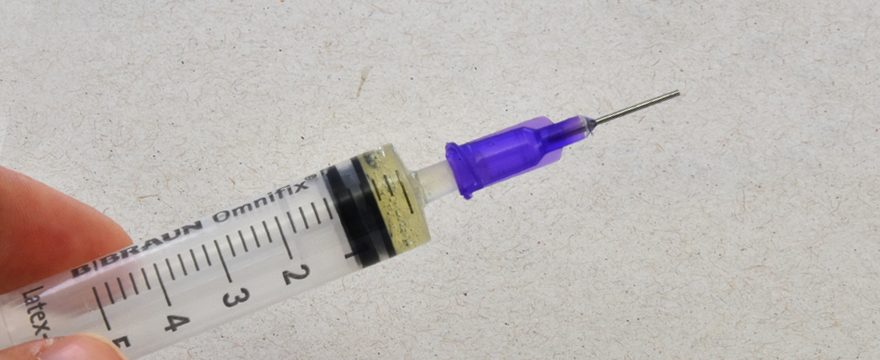
3. Put the glue in a dispenser.


When the glue is properly mixed, you can insert it into a syringe which will help you keep your working environment and hands clean.


The honey like consistency of the 500 glue is easy to use with this regular syringe.
When working with the 600 glue you need a tiny drop for each crystal, that is way we recommend to use a dispensing tip on this syringe.


4. Attach the dispensing tip to the syringe.


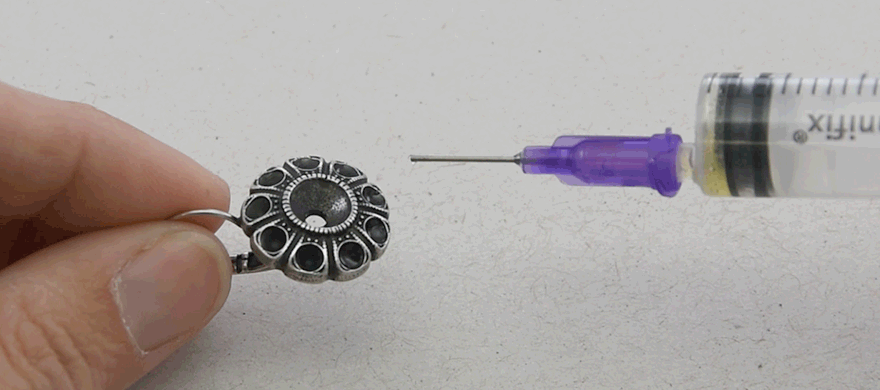
5. Inject a tiny drop of glue into the place of settings, to fill 1\3 of the hole.

Always make sure that the surface of the element is free of oils, so that the glue would be strongly connected to the surface.


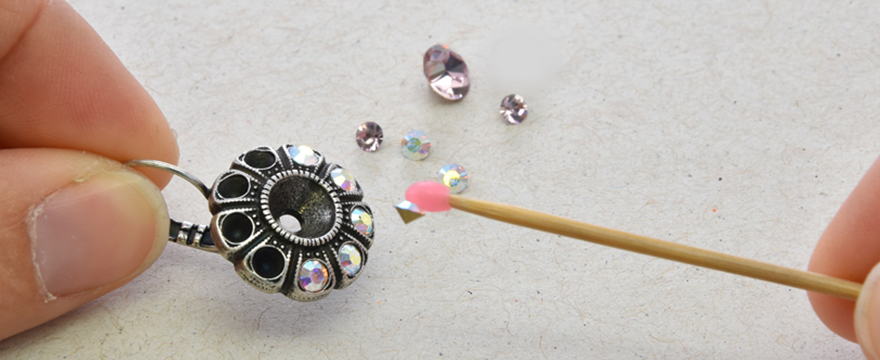
6. Place the crystal in its place with the help of the wax tip.


These Swarovski glues are specially designed for working with crystals, and they can really make your work be faster, cleaner and get a much more professional result.


Have fun creating!

GITA team.


Title
Plating/Rhinestone
Quantity
Price

Related Tutorials:

Gluing on embedding elements - DIY Tutorial
Learn how to use the embedding elements as a base for gluing crystals and other elements and making ...
Step by step DIY
Timeless jewelry styles
We have collected for you some of the most popular trends and styles that are timeless and always re...
Gita's magazine

Help us improve our school

Was the information Usefull? Yes No
Name:
Email Address:
Which other tutorials or articles would you like to see
Please note any suggestions for improvements for us to get better?

Please Wait

Succuess

Error Failed

0.7560135