clear all

Type

Gita's magazine
Video tutorials
Step by step DIY
Styling ideas
Learn new Technics
Most popular
Crystals inspiration
Color combinations
Technical questions

Jewelry

Necklace
Bracelet
Earring
Ring
Pendant
Hair Accessorie
Jewelry sets

Techniques

Embedding
Gluing
Beading
Other
Crimp Elements
Stringing

Materials

Cup chain
Stone setting
Metal embedding
Metal casting
Charms
Chains
Swarovski
Cabochons
Beads
Leather
Strings
Pearls
SW rhinestone

Skill level

Beginners
Intermediate
Advanced

Metal Plating

Antique Silver
Antique Silver
Antique Copper
Antique Copper
Antique Brass
Antique Brass
Shiny Silver
Shiny Silver
Gold
Gold
Nickel
Nickel
Rose Gold
Rose Gold
Black
Black
Bronze
Bronze
Noir Black
Misty Gold

Colors

Black
Black
Gray
Gray
White
White
Yellow
Yellow
Orange
Orange
Red
Red
Pink
Pink
Purple
Purple
Blue
Blue
Turquoise
Turquoise
Green
Green
Multi-color
Multi-color
Brown
Brown
Metallic
Metallic
Beige
Beige
Sparkly
Sparkly

Themes

Casual
Basic
Fancy
Bridal
Ethnic
Urban
Young
Vintage
Flowers
Winter
Spring
Summer
Autumn
Christmas
Valentin’s day
Mother’s day
Holidays
Religion
Evening

Necklace with sea elements tutorial

Necklace with sea elements tutorial

28/06/2015
Necklace with sea elements tutorial


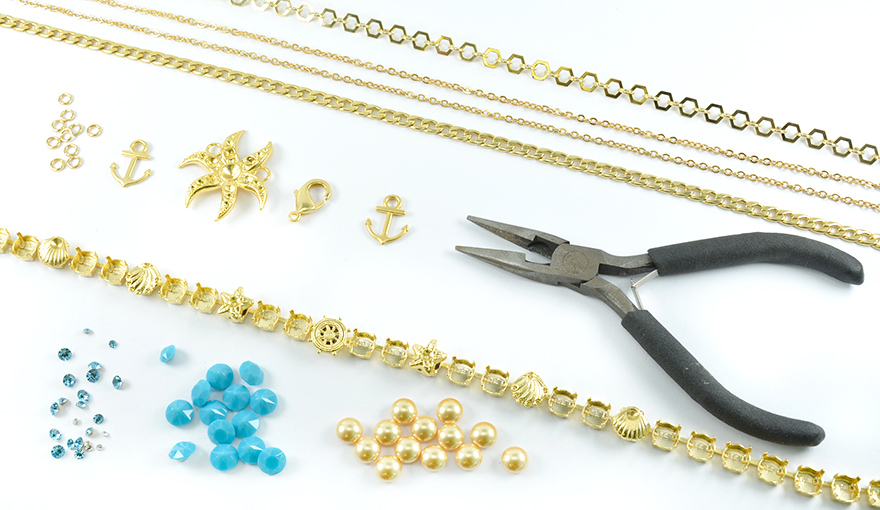
step 1: preparing your materials


Prepare your work environment. Organizing your tools and materials will help

you work faster and more efficient.


Hexagon and round loops chain – two pieces of 4cm long each.


Gold flat gourmet Chain – 40cm long.


Gold oval loops chain – two pieces of 24cm long each.


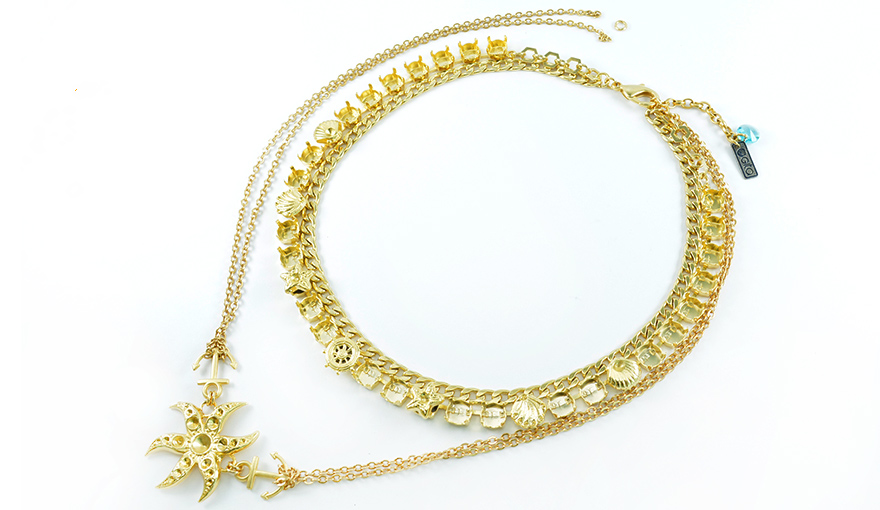
Step 2 : connecting the necklace base


Use 6mm jump rings and connect two 4cm long pieces of the hexagon and round loops chain at both ends of the cup chain.


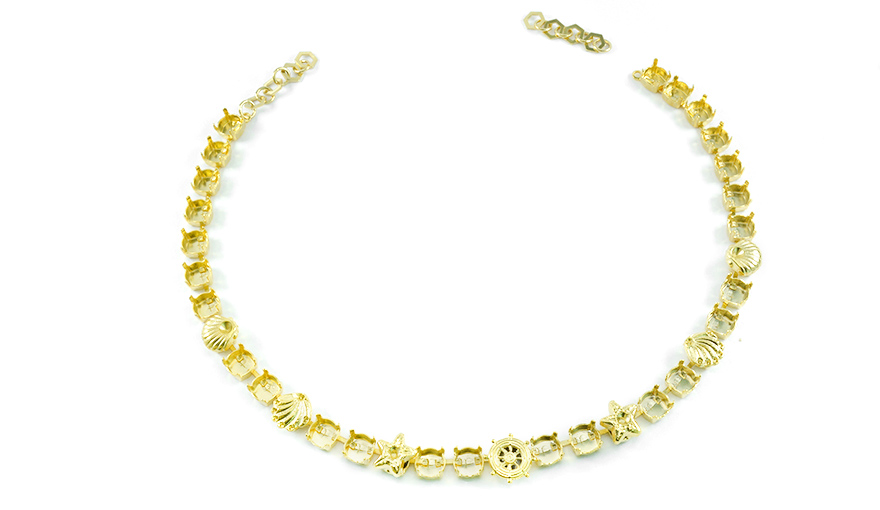
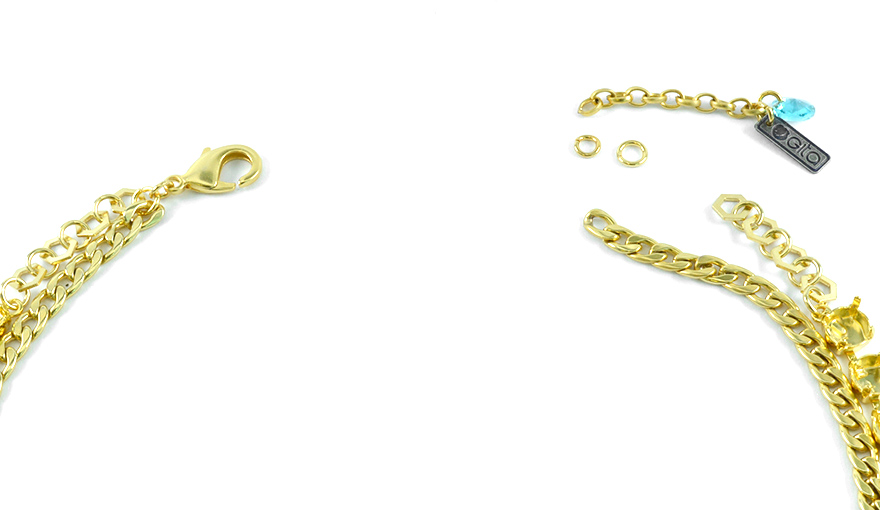
The flat gourmet chain is connected at the inner side of the cup chain with 5mm jump rings to the jump rings at the ends.


Also connect the clasp on one side and the extension chain with metal label and Swarovski stone on the other side.


Step 3 : hanging the second chain


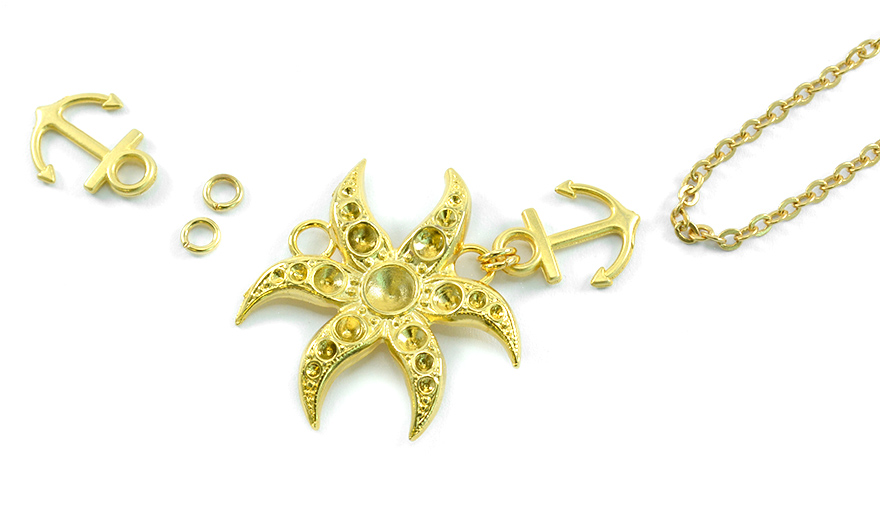
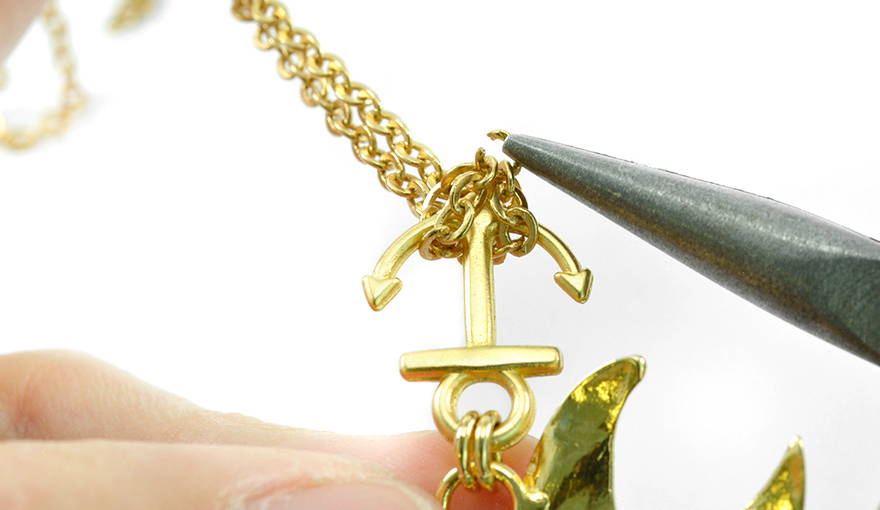
Use two 5mm jump rings to connect the anchor charms to the starfish pendent.


Find the center of the oval loop chain and hang it on the anchor charm.


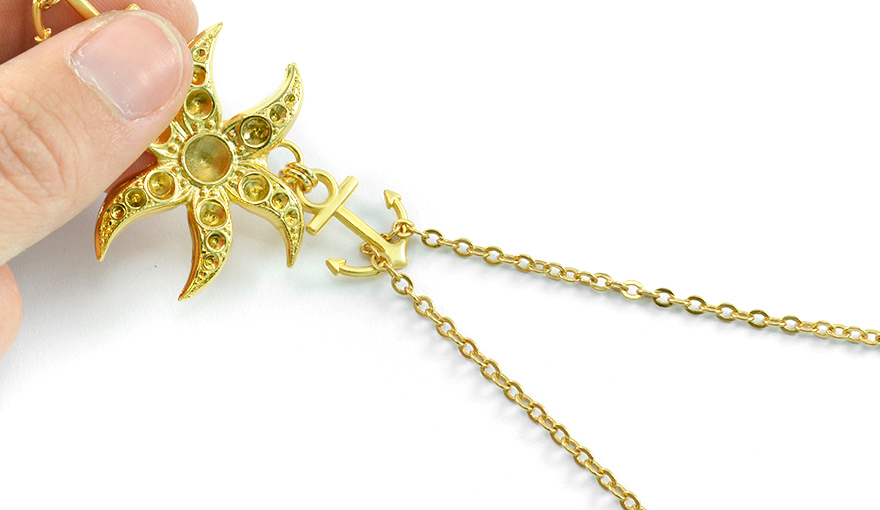
Take the chain a little bit back words to create a kind of loop.


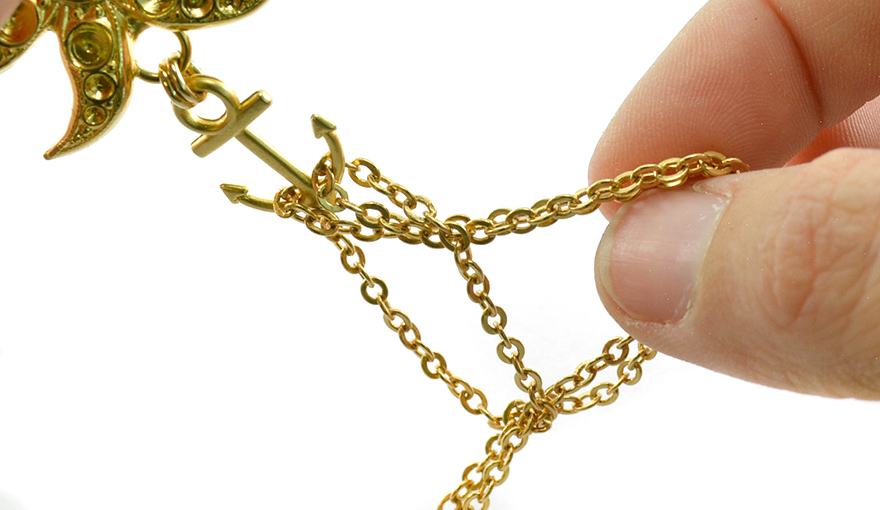
Now, slide the ends of the chain inside the loop and pull it until it holds the anchor charm tightly.


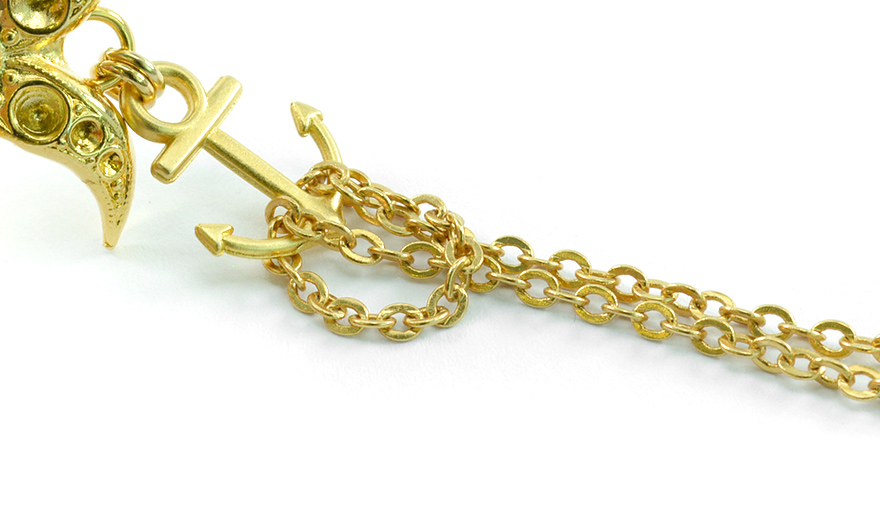
Open one small oval loop from the chain with the cutting tool and use it to connect two loops of the chain, so that the knot will not open.


Use 5mm jump ring to hang both ends of the oval loop chain to the jump rings at the back of the necklace.


Step 4: setting the stones


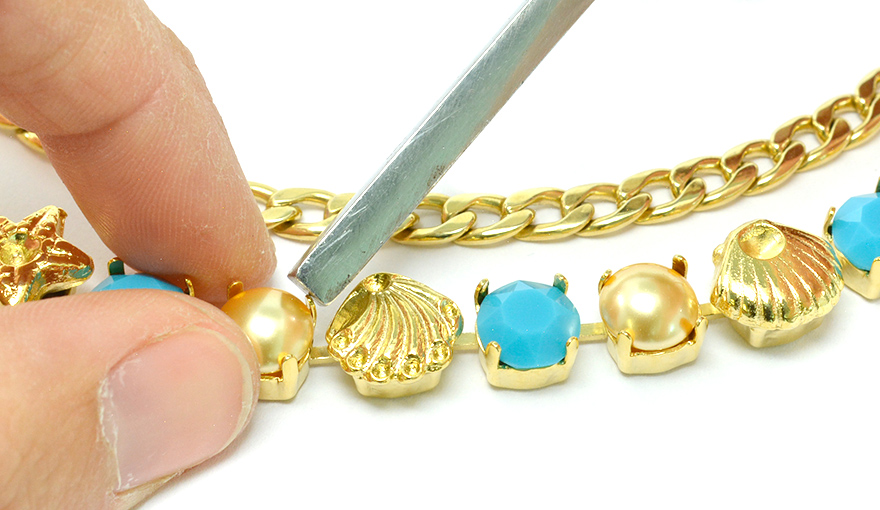
Place the stone in the center of the stone setting and with the help of the setting tool bend the prongs towards the stone in order to embed it.


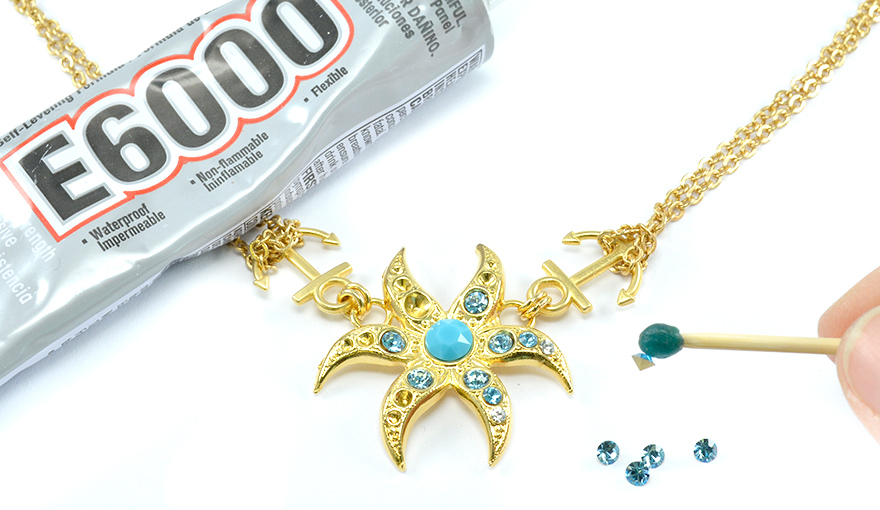
Apply small amount of the E6000 glue inside the small holes on the starfish and place the small stones in there place.


In the same way, set the small stones on the metal elements in the cup chain.
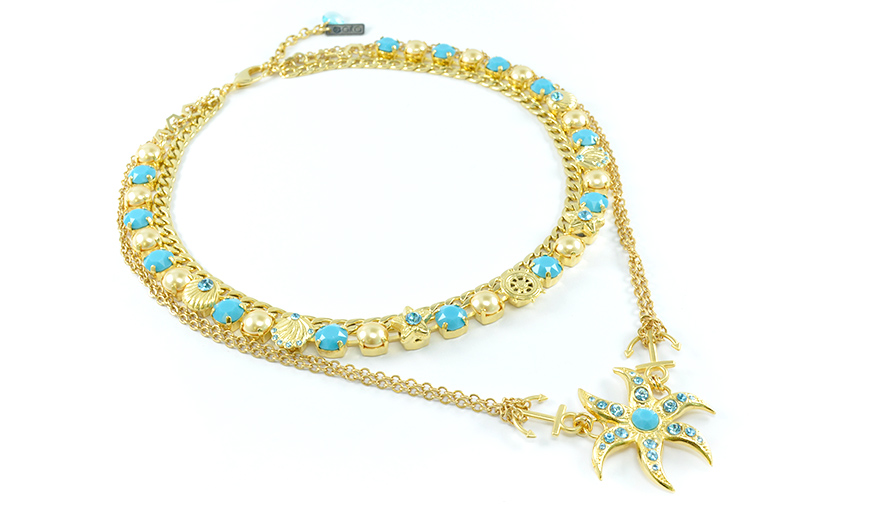


wonderful!

The necklace is ready!


Enjoy your new beautiful Swarovski necklace.


Gita team.

Title
Plating/Rhinestone
Quantity
Price

Related Tutorials:

Dainty Jewelry collection for spring
Creating a delicate & dainty collection using the small 24ss and 29ss jewelry bases with beautiful s...
Gita's magazine
The four elements of nature
The four elements are a great inspiration for art, fashion and modern culture and if you are looking...
Gita's magazine

Help us improve our school

Was the information Usefull? Yes No
Name:
Email Address:
Which other tutorials or articles would you like to see
Please note any suggestions for improvements for us to get better?

Please Wait

Succuess

Error Failed

0.7608994