clear all

Type

Gita's magazine
Video tutorials
Step by step DIY
Styling ideas
Learn new Technics
Most popular
Crystals inspiration
Color combinations
Technical questions

Jewelry

Necklace
Bracelet
Earring
Ring
Pendant
Hair Accessorie
Jewelry sets

Techniques

Embedding
Gluing
Beading
Other
Crimp Elements
Stringing

Materials

Cup chain
Stone setting
Metal embedding
Metal casting
Charms
Chains
Swarovski
Cabochons
Beads
Leather
Strings
Pearls
SW rhinestone

Skill level

Beginners
Intermediate
Advanced

Metal Plating

Antique Silver
Antique Silver
Antique Copper
Antique Copper
Antique Brass
Antique Brass
Shiny Silver
Shiny Silver
Gold
Gold
Nickel
Nickel
Rose Gold
Rose Gold
Black
Black
Bronze
Bronze
Noir Black
Misty Gold

Colors

Black
Black
Gray
Gray
White
White
Yellow
Yellow
Orange
Orange
Red
Red
Pink
Pink
Purple
Purple
Blue
Blue
Turquoise
Turquoise
Green
Green
Multi-color
Multi-color
Brown
Brown
Metallic
Metallic
Beige
Beige
Sparkly
Sparkly

Themes

Casual
Basic
Fancy
Bridal
Ethnic
Urban
Young
Vintage
Flowers
Winter
Spring
Summer
Autumn
Christmas
Valentin’s day
Mother’s day
Holidays
Religion
Evening

How to use the adhesive manual gun for Swarovski glue

How to use the adhesive manual gun for Swarovski glue

12/09/2016
How to use the adhesive manual gun for Swarovski glue

Here is a full explanation for the way to use this adhesive manual gun specially designed for the CG 500 and CG 610 Swarovski glue:
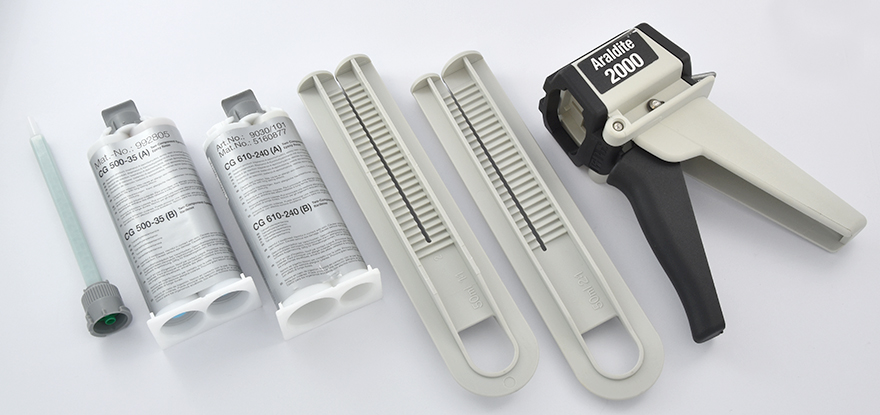
 

Components:
Adhesive manual gun
2 plungers, one for each glue
Mixing injector
CG 500 glue
CG 610 glue


This device comes with two plungers, that pushes the tubes of the glue at the same time, so that the same amount of glue would come out.

This is very important because that is the best way to make sure that the glue is mixed with the exact ratio it needs in order to be as strong as it was designed.


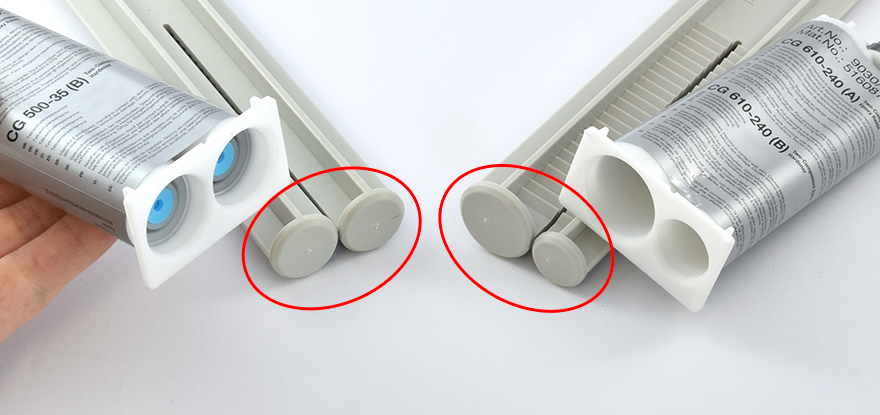
Each plunger is designed for one of these Swarovski glues:
The one with the tubes in the same size is for the CG 500 glue.
The one with the large and small tubes is for the CG610 glue.


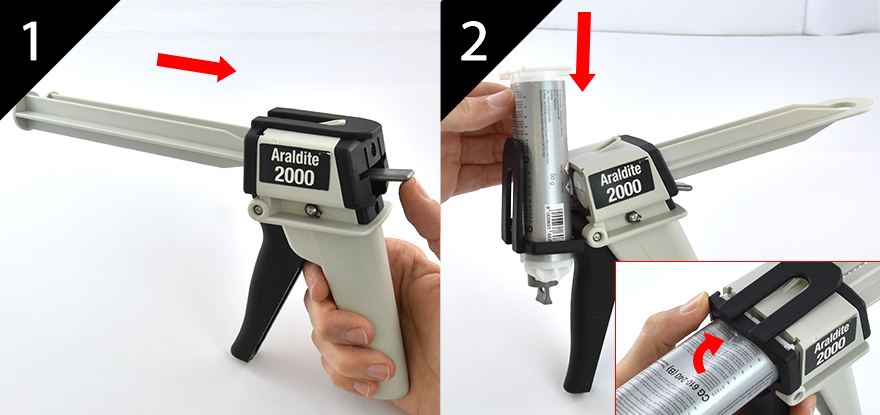
1. Lift the metal handle at the back of the gun, so it will stand right in the middle and will clear the way to insert the plunger all the way through the gun base.


2. Once the plunger is placed all the way to the back of the gun base you can slip the glue tubes inside the black frame from the top side, all the way down. 

When you lift up the black frame with the glue tubes, there is a small bulge on top that needs to make a ‘click’ so that you know it is strongly fastened.


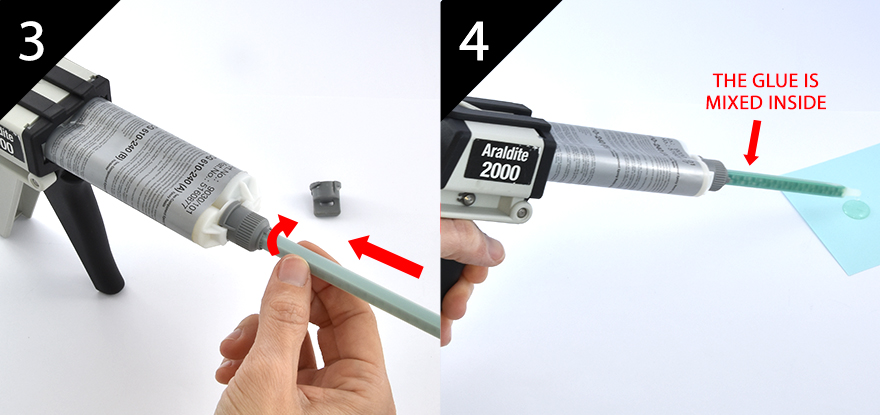
3. Unscrew the top of the glue tube. Place the mixing injector instead and screw it tightly.


4. When you press the gun you can see that the glue it mixing nicely inside the injector. That small amount of glue that is the first to came out is not a good mix, so get rid of that and use the rest of the glue that would come out.


Now you can choose which way is more comfortable for you to work with this glue. You can use a syringe or not, whatever is right for you.
Here you can see how to use the syringe, if you like.


GITA team.

Title
Plating/Rhinestone
Quantity
Price

Related Tutorials:

Choker necklaces Tutorial DIY
Get some useful tips for creating choker necklaces - one of the big trends for 2017
Gita's magazine
The Swarovski Rhinestone Guide
Add an extra touch of glam to your jewelry collection using the Swarovski rhinestone!
Gita's magazine

Help us improve our school

Was the information Usefull? Yes No
Name:
Email Address:
Which other tutorials or articles would you like to see
Please note any suggestions for improvements for us to get better?

Please Wait

Succuess

Error Failed

0.713955